Showing posts with label recipe. Show all posts

Friday, November 22, 2013

No flour Oatmeal Cookies: Almond, Honey & Apricot Glaze

Just like Paula Deen's son Bobby Deen, I also like to make-over Paula's recipes, do not get me wrong, she has some great recipes but, when I am able to cut fat/calories for my family and I, I do a 'remix' on one of her original recipes. I too like Paula, have a sweet tooth but, with my recipe, you can have the sweet plus, a little less adage to your waist line.


A bit Nutty

By adding walnuts, sunflower seeds, almonds and peanut butter, you will be adding plenty of protein to balance the carbohydrates you will be placing in your mixing bowl.  Topping it off with a honey apricot glaze will add a bit of sweetness and the slivered almonds will add another layer of flavor and added texture...

Will make these cookies your 'go to' recipe when you want a healthier version of what we all crave, cookies!

Ingredients...

 4 cups rolled oats

1/2 cups sunflower seeds (shelled)

3/4 cup walnuts (Chopped)

1/2 cup chocolate bar (chopped)

1 1/2 cups peanut butter (I prefer crunchy)

1 stick of butter (unsalted)

2  eggs

1 1/2 cups dark brown sugar (light will work just fine)

1/2 teaspoon salt

1 teaspoon vanilla extract

2 teaspoons baking soda

GLAZE

1/2 cup apricot preserves

1/4 cup honey (I used a orange blossom honey, use what you like)


1/2 cup of sliced almonds (to place on top of your cookies)


Enhance Your Nutty Side


Roasting the nuts, this is one step 'I do not' skip and I recommend you 'do not' skip it either.  When using any kind of nuts/seeds in a recipe, I recommend you take this one step.  When you roast the nuts you are going to use in a recipe, it brings them to life and adds such richness to your dish.

When I came up with this recipe I used some leftover walnuts that I found in my freezer and they were already chopped but, if you are able to get whole nuts, please do so, they roast better.  I would then roast the walnuts for 5 minutes (taking out and stir 1/2 way into cooking), before adding the sunflower seeds.

On a cookie sheet, covered with parchment paper, place your (chopped) walnuts and place your sheet into a 350 degree oven, for 3 minutes.  After 3 minutes take the cookie sheet out, stir the walnuts and add your sunflower seeds, roast for another 3 minutes, take the sheet out and toss the sun flower seeds and nuts, if they are not yet golden brown then place back in the oven, at one minutes intervals.

While you are waiting for your walnuts and sun flower seeds to roast, place your rolled oats and baking soda in a big mixing bowl and set aside.

Peanutty Goodness!

In another mixing bowl, add your sugar and eggs, mix (hand mixer-on high, my standing mixture-on medium) together until the mixture goes a bit pale, then you know you have gotten to the smooth consistency you are look for.

Bottom line is, you want to have a non-grainy consistency.

After you have reached the perfect consistency with your sugar and eggs combination, add your peanut butter, stick of butter, salt and vanilla extract to the mixing bowl.

Mix (same speeds as above) until well blended, when blended add your chocolate pieces and mix with a spoon.  At this time, add your 'cooled' walnuts and sun flower seeds to your oatmeal/baking soda bowl, mix well.

We Are Joined Together


With your oven set on 350 degrees, take out two cookie sheets and place parchment paper on each sheet.

It just keeps you from having to do so much cleaning up afterwards and they are easier to get off the sheet too boot, set aside.

If you have a non-stick cookie sheet than bypass the parchment paper.

Add your wet ingredients to your dry ingredients and stir until well blended.

The 'right' Tool


I have found when you have the right tool to accomplish a task, it is easier on this granny and also, the whole process runs so much smoother and also, it gets done faster.

I only have 2 cookie sheets but if you have 4, then it is worth using them.  I use a (slightly smaller) ice cream scoop then the average size that most home cooks use and actually, it would be just about the right amount in your average ice cream scoop in the end.

I use what I have.

 I scoop up a heaping mound full and do 'only' 4 cookies per cookie sheet pan, yes these are big cookies.

Place your cookies in the oven for 12-15 minutes, until 'slightly' golden brown, take out and place on a cooling rack.

Glaze it Baby!

Place your apricot preserves and honey in a small sauce pan, on medium heat, constantly stirring, until the preserves & honey are combined and is at a pouring consistency.

You can always place it back on the heat to melt the honey and perserves as you are using it, as it will tend to seize up.  I would rather do this step, than to have a runny glaze.

Place your cookies on a cooling rack, 5 minutes after you have taken them out of the oven.

This is where those 4 cookie sheets would come in handy, since you have to wait a bit of time before you are able to use the sheets once again.  Though even with two cookie sheets, I am able to pop these out in around one hour, from start to finish.

Another Layer of Flavor

Make them as gooey and nutty as you like

I will only add the glaze to 4 cookies at a time, so the next layer of taste and texture of the almonds will be all stuck to those cookies before the apricot preserves and honey glaze has time to dry.  Yes, I too roasted these nuts before adding them to the top of this goodness.

I do not allow my slivered almonds get much if any color, I cook them just so I am able to see/hear the oils coming out of the nut.  I find if you roast the slivered almonds as you would a walnut, pecan and even a whole almond, they tend to be a bit bitter...

Now that is not helping our goal of gaining a sweet goody to place in your cookie jar, now are we.

A few more goodies to add to your recipe box...

Southern Sweet Potato Casserole

Carrot Cake: Done Mama's Way!

Paula Deen's website: www.pauladeen.com

All photographs are the property of Denise O.  Do not use unless you get 'my' written permission. All written material is owned by Denise O, it will not be 'used' (sharing my article is different, acceptable and appreciated) without 'my' written permission.  Just keeping it real folks.:)

Monday, February 25, 2013

Corned Beef Sandwich: Honey, Mustard & Grape Seed Oil Slaw

Yes we are approaching that time of year that those of us that are not Irish, become so on St. Patrick's Day.  I will be making my corned beef & Cabbage dinner, just like Mama did.


Bit Irish


Mama always made us corned beef and cabbage on St. Patrick's Day and she made sure to make enough corned beef so we could have sandwiches the next day.  Mama and the rest of the family have always loved thousand island dressing, so they would make a reuben sandwich.  I just made mine by adding mustard, tomato and lettuce.  As I grew up my taste also grew up and so I came up with this recipe that takes in to account, all the tastes of the corned beef sandwich I had growing up, just in a more mature way.

Ingredients

This recipe will make 4 sandwiches.

2 pounds corned beef

1/2 head cabbage (small)

3 tomatoes (depending on the size)

1/2 cup grape seed oil

2 1/2 tablespoons ground mustard (I like to use course mustard)

1 tablespoon honey

1 teaspoon fresh cracked black pepper

1 Tablespoon salt

8 slices of rye bread

I prefer to use rye bread but, use what 'you' like when making a corned beef sandwich.  Also, if you would like to use more corned beef than I suggested, be my guest and who could blame you.

Sweet & Spicy


Slice your cabbage fairly thin, add to a colander, sprinkle with salt, toss and set aside for thirty minutes.  In the meantime slice your tomatoes and set aside.

In a medium size mixing bowl add, mustard, honey, grape seed oil, cracked black pepper and mix well, set aside.  When thirty minutes are up, rinse your cabbage with 'cold' water and drain well.  If you have a salad spinner, spin it well or if not, take a towel or some paper towels and get off as much of the water as you are able.  Add your cabbage to your dressing and mix well.

The Grain

I allow my slaw to sit on the counter for 30 minutes before using, it allows time for all the flavors to mix and mingle.

You can use deli corned beef and it will still turn out to be a good sandwich but, to make it great sandwich, make your own corned beef and you slice it.

Remember to 'always' cut against 'the grain' and make your slices thin, you can pack on as many pieces as you like but, your corned beef has a better flavor and texture when you slice it thin.

I thought, how will I tell my readers why I salted the cabbage well, as most of y'all know, cabbage can be a bit gassy.  With my husband, I know this all too well.

The salt & rinse method seems to damper this one side effect of eating cabbage that most of us wish was not there.

Assembly Line


All you have to do now is to make an assembly line and let the family make their own, so they are able to have it their way.

Place out that thousand island, Swiss cheese or what you feel your family will like and then you too, will come up with 'your' favorite sandwich.

My Way...


I really wish you would try your corned beef sandwich my way, I know you will not be disappointed, I know I my family loves them.  Happy St. Patrick's Day to you and yours.:)

Here are a few recipes of mine that just might tickle your fancy...

Corned Beef & Cabbage Dinner

Club Sandwich: Turkey, Ham, Bacon & cheese, Oh My!

All photographs are the property of Denise O.  Do not use unless you get 'my' written permission. All written material is owned by Denise O, it will not be 'used' (sharing my article is different, it is acceptable and appreciated) without 'my' written permission.  Just keeping it real folks.:)

St. Patrick's Day: Corned Beef & Cabbage, Baby!

Just add some potatoes & Carrots and you can not go wrong with this lovely dinner.  It might even make you feel a bit Irish on March 17, 2013.


I tip my Hat to the Irish

Yes, I must tip my hat to those wonderful people and this one classic that is served around America on St. Patrick's Day each year since I have been here on earth.  Mama would cook her scrumptious corned beef dinner, each and 'every' year.  I still make my plate the exact same way as I did when I was growing up.

Mustard on my corned beef, butter on my potatoes and carrots and malted vinegar on my cabbage, this combination has yet to fail and as I dive into it now, I am reminded of the warmth of Mama's kitchen.

I will cook two corned beefs this year, as I always do.  This dish only gets better, as it ages and also, I make a mean corned beef sandwich, even if I must say so myself.  At times I will make a pan of some corned beef  hash, a few poached eggs topped over it and of course bread of your choice for sopping up all that goodness.

Do not pass up this chance to surprise your family and allow me to guide you through to a corned beef meal you will serve your family all throughout the year, not just on St. Patrick's Day.

Ingredients


6 pound Corned Beef

1 pound carrots

5 pounds red potatoes

1 large head of cabbage

The package of spices that comes with your corned beef.

Of course your corned beef more than likely will not be six pounds, so please go by the cooking times on your corned beef package, I do, always.

When I am cooking my second corned beef, I will also add one pound of carrots and the spices to my pan, just as I did for the one I will be using for my dinner, just minus the carrots, cabbage and potatoes.


I 'am' Braising 


Preheat your oven to 350 degrees.  Look on your corned beef package, check the weight of your beef and also look at the cooking (time) directions and 'write it down' how long it will take to cook 'your' corned beef, important!

Once you open your package of corned beef, you will 'not' want to dive into the trash can to 'once again' check and see how long that thing must cook.

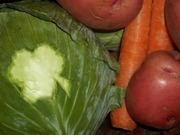
Place your pound of carrots on the bottom of your roasting pan (I use a throw away pan) and as you are placing the carrots, turn them so you have as even of a bed of carrots as you are able to achieve.

Lay your corned beef on top of your bed of carrots and sprinkle your corned beef with the seasoning packet that came with your corned beef on top and around your corned beef.

Add enough water so as the water level reaches half way up your roasting pan.  Cover your roasting pan with tin foil and seal tightly.


I use organic carrots, so I don't peel my carrots.  Now if the hubby makes a mistake and grabs non-organic carrots I do peel those carrots.  This is your dish, I am just giving you the basics, you make it your own.

Feeling 'more' Irish


Thirty minutes before your corned beef is done, peel your potatoes or if you do like the peelings on, by all means keep the skins on, just wash them before adding them to your pot.  I peel the potatoes because Mama did and I like my St. Patrick's dinner, just as she made it for me when I was a child.

You will notice that your bag of red potatoes will (almost always) have a few bigger ones than the rest of the bag, just cut those in half.  Keep your (peeled) potatoes in a bowl of cold bowl of water and set aside.  Cut your cabbage into eight wedges.  After taking off the very end of the core at the bottom of your cabbage I leave the rest of the core, I find it cooks down just fine and keeps your edges intake.

When your corned beef and carrots are done, remove from the pan, place your corned beef and carrots on a platter and cover with the tin foil you used to cover your roasting pan.  Place the corned beef/carrot broth into a stock pot, add your potatoes and cabbage, wedging the cabbage around the potatoes.  Add enough water to cover your potatoes and cabbage, bring to boil, cover and allow to simmer for thirty minutes.

After thirty minutes, place your carrots into your pot and on top of the vegetable, place some sliced corned beef, cover and simmer for five minutes.

Can You 'cut' it

I Don't know why but, cutting meat always seems to scare a lot of folks.

My friends, it is very easy once you learn the secrets.

I love my corned beef cut on the thin side.  I will see which way the lines go through the meat, this is called 'the grain'.

You want to cut across the grain', as pictured on your right.  You might have to turn your meat around a few times, as the grain is not even throughout this cut of meat.

If you cut with the grain then, it will still taste good but, you will be gnawing on that meat for awhile.

Yes, I cooked my other pan of corned beef right along with the one I cooked for dinner.  You see, I love a good corned beef sandwich and as I have stated before, this dish only gets better with time so why not have more.

I will add my carrots from my extra corned beef to the stock pot also, it seems we never have enough carrots.  Make sure to test your potatoes every 10 minutes and adjust the time you add your corned beef and carrots back into your pot.  All you are doing is warming up your carrots and corned beef.  Place on a platter and serve.

Open Wide!


What can I say, is this mouthwatering or what, I say "You bet 'your bippy' it is.".  I am sure your family too will enjoy this meal as much as mine does.  Around St. Patrick's Day is the best time to buy corned beef and that is when I will stock up, so as to warm up my family's Sunday's throughout the year.

I also would love to share with you my favorite corned beef sandwich recipe, the slaw is what makes it...

Corned Beef Sandwich: Honey, Mustard & Grape Seed Oil Slaw

For another lovely, delicious and warm meal for your family, please visit...

Lentil Soup:  Vegetarian 'or' Ham Bone!

All photographs are the property of Denise O.  Do not use unless you get 'my' written permission. All written material is owned by Denise O, it will not be 'used' (sharing my article is different, it is acceptable and appreciated) without 'my' written permission.  Just keeping it real folks.:)

Wednesday, February 20, 2013

Carrot Cake: To frost or Not to frost?

I know a lot of us have had some awful carrot cakes in our time but, please let me show you, how you can make it so your family will be coming back for seconds, no doubt!


My carrot cake recipe came from my mama's recipe box, I have altered some things here and there but, it has not taken away the wonderful taste of this classic carrot cake.  Another reason why I love this cake is because, it can be made as a breakfast bread, minus the frosting.  It can be made in a 13X9 cake pan and topped with some icing.

Or you can go over the top and make a three layer cake, loaded with cream cheese icing and coconut.  The third option is my son's favorite cake so much, it is now his birthday cake every year.  Mind you, my son is not a big vegetable eater by the way.

Ingredients

2 cups white flour (no self rising)

2 cups carrots (grated)

2 cups granulated sugar

1 cup (can) crushed pineapple

1 cup (sweetened) coconut flakes

2 cups walnuts

1/2 cup buttermilk

1/4 cup canola oil

1/4 cup butter

2 (whole) large eggs

2 egg yolks

2 teaspoons baking soda

2 teaspoons (ground) cinnamon

1 1/2 teaspoons salt

1 teaspoon vanilla extract

1 ripe banana (mashed well with a fork before adding to your mixing bowl)

1/2 cups applesauce (homemade is better)

Frosting Ingredients

1 1/2 cups butter (unsalted)

2- 8 ounce packages cream cheese

5 cups powdered sugar

1 Tablespoon Vanilla extract

You can decorate your layer cake with (sweetened) coconut, nuts and I will even toast coconut and add that, it just depends are what I have and the mood I am in.

We're Off


Preheat your oven at 350 degrees.  Grease and flour your cake pans and set aside.

In a big mixing bowl place your sifted flour, baking soda, cinnamon and salt, mix then set aside.

This next step is essential:  Empty your can of crushed pineapple, open and place your pineapple into a mesh strainer.  With the back of your wooded spoon press out as much of the pineapple juice as you are able.

If you skip this step, you will be baking this cake for a long time and only end up with a burnt cake, that still jiggles in the middle.  

So please take the time to do this one step.

Let's Get Nutty...


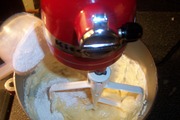
My husband is so sweet he bought me a kitchenaid mixer but, if you do not have a stand up mixer than just use a bowl and a hand mixer, it will be just fine.

In your mixer/big bowl place your oil, eggs, sugar, buttermilk, carrots, coconut, pineapple, banana, applesauce and your vanilla extract. Mix on low for 2 minutes or until all ingredients are well incorporated.

I find it takes less time in a standing mixer. Add 1/2 your flour and mix for around 30 seconds and then add the other half of your flour, mix for another minute or until all flour is well incorporated.

Then stir your nuts into your batter with a spoon.

Pour in that Goodness


If you are making a sheet cake, pour your finished batter into a (well) greased & floured 13X9 cake pan, bake for 40 minutes or until a tooth pick is inserted in the middle of your cake and the toothpick comes out clean.  Cool on a rack and then frost.

If you want to make this a breakfast cake, omit the frosting, serve warm.  Making sure you have plenty of butter and honey to top it off.

Now if you are wanting to go all the way and make your carrot cake a bit fancy...

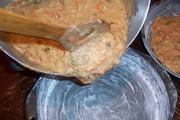
Pour your carrot cake batter into 3 'well' greased & floured 9 inch cake pans.  Bake for 30 minutes or until a tooth pick is inserted into the middle of your cakes and the tooth pick comes out clean.

Start Your Engines...


The day I am going to make this delicious cake, I take my butter and cream cheese out of the refrigerator and set them on my kitchen counter in the morning.  You need room temperature butter and cream cheese, or you end up with a chunky and not so tasty icing.

Place your softened butter and cream cheese in your mixing bowl, mix for 2 minutes until both ingredients are well incorporated and starting to get a bit fluffy. Turn your mixer on low and start to add your powdered sugar, one cup at a time.

Allow the powdered sugar to absorb into the butter/cream cheese before adding the next half of cup. Repeat until all powdered sugar is gone.

When all your powdered sugar is incorporated add your vanilla extract, turn your mixer up to medium and mix for 2 minutes, until you get a fluffy consistency.

You only need half of your icing if you are making a sheet cake, place the other half into a container (I am using Alabama Tupperware) and place in the freezer for your next cake.

When you want to make another sheet cake, take out your icing, place it in the refrigerator over night to thaw out.  When you are ready to use the icing, mix well.

Frosting 101


When I stated earlier that you are to grease and flour your cake pans, I really mean this when you are going to make this cake a 3 layer cake.  By well greasing and flouring your pans, you are then able to take these lovely cakes out with ease.

Also very important is, make sure your cakes are cooled down completely.

Lay your first layer down on your serving plate.  I do not cut this cake so as to make it even, I start with first layer and if I see that the first layer is a little lopsided, I will push it down, this cake if very forgiving.

When even then take 1/3 of your icing and ice the top and sides of that layer.  Repeat until you have covered all three layers.  I would usually tell you to place some wax/parchment paper around the cake, so you have a clean plate but, since you are adding coconut around the side, no one will spot a mistake and also, the coconut will hide any of the over flow of icing.

Make them Smile...


Yes there was a bit of work to be had but, all in all, putting a smile on the face of the ones you love it so well worth it.  Once you have made this cake a few times, it really comes a easy recipe and one, I am sure you will be serving many times over.

Homemade Applesauce

When serving brunch this is a wonderful breakfast bread to add to your mix, also try adding...

Baked Potato Quiche:  Mama's Got 'it' Loaded

All photographs are the property of Denise O.  Do not use unless you get 'my' written permission. All written material is owned by Denise O, it will not be 'used' (sharing my article is different, it is acceptable and appreciated) without 'my' written permission.  Just keeping it real folks.:)

Homemade Applesauce: Orange, Apples & Cinnamon, Oh My!

Very few aromas make a home warm and inviting than the smell of apples and cinnamon cascading throughout your home.  This applesauce recipe smells heavenly while cooking. It also is a very delicious dish on its own or added to a recipe to bring that recipe over the top.


Ingredients

8 apples (I used 6 red delicious and 2 granny smith)
1 cup apple juice
1/3 cup sugar (white)
1/2 cup honey (I used orange blossom)
1/2 cup orange marmalade
1/3 cup packed brown sugar
2 cinnamon sticks
1 lemon
pinch of salt

I like to use organic fruits, I know they are usually more expensive but, I will let you in on one of my secrets. When I see organic apples on sale and the price is the same as regular apples, I stock up.  I then will make a double or even a triple batch of this applesauce, as it stores well in your freezer.

AKA Alabama Tupperware

I place some (enough to feed my family as a side dish)  in freezer container so I can just take it out the night before I am going to serve my family say a, pork chop dinner.  I will also measure some of the applesauce out and place in quart side freezer bags, so I can take one out when I want to make the other recipes I use this applesauce in.

Peelingsssssss

In 2 large bowl add some cold water, cut your lemon in half.  Squeeze one half of your lemon in each bowl and add the halves to each bowl.

As you are peeling your apples, allow the peels to drop into one of your bowls.

When your apple is peeled, place your apple into the other bowl.  Continue until you have peeled all your apples and they are resting in your lemony water bath.

Yes I do have a surprise for the peelings, just set them aside.

Cut & Scoop

After you have peeled all of your apples, cut your apples in half.

Take a melon scoop and take out the core. Then cut each half of your apple and them them in quarters.

Place all your cut apples into the lemon water, until you are ready.

By placing them in the lemon water will help them from browning.

This whole procedure will only take about 10 minutes but, your apples (if not placed in the lemon water) will brown with a minute or two, so do not skip this step.

Pour that Liquid Gold


Place your cut up apples, apple juice, sugar, ornage marmalade, honey and 2 cinnamon sticks into your crockpot.  Place the lid on your crockpot, set your crockpot on high for 1 hour, stir, replace the lid and lower the setting on your crockpot to 'low'.

Cook for 4 hours, stirring every hour.  After 4 hours is up then add your brown sugar, mix well and then replace the lid.  With the temperature off, allow your apple sauce to sit for 15 minutes, mix and serve.

No Waste Here


If you are like I am and want to use most 'all' of the produce you have bought then continue with this next step.  You can make your bundles while the applesauce is simmering away.

Take your apple peels and split them up into six lunch baggies (no sense in using heavy duty bags) and set aside.

Then go to your spice cabinet and take out some of those whole cloves that have been just sitting on your shelf since the last holiday season, add 6 or 7 cloves per baggie.

Then place one cinnamon stick into each baggie, close the baggies up, place all our baggies into a gallon size freezer bag and place into your freezer.

Now when company is coming or you see that ever too curious neighbor heading your way, then grab a bag, place into a small sauce pan, take out a baggie and dump the contents into your pan.  After the apple peels & goodies have come to a boil, turn down the heat to a low simmer and just let that lovely aroma cascade all through your house and then you have delicious smelling home.

I Can Hardly Wait to Dig in


Now, I am sure you will find many ways to use this applesauce.  Mixed into a bit of yogurt for breakfast, placed into a cake recipe to replace most of the oil.  Just keep in mind the flavors you have going on in your pot and then allow your imagination take you away.

Yes  I do use this applesauce in a few of my dishes but, my absolute favorite way of eating this sweet goodness is sitting in a bowl next to a few pieces of ham and a side of green bean casserole.  Which ever way you want to use/serve this applesauce, I am sure your family will enjoy ever bite of it and ask for more.

The recipes I add my homemade applesauce to is...

Carrot Cake:  Done Three Ways!

Southern Style: Sweet Potato Casserole

All photographs are the property of Denise O.  Do not use unless you get 'my' written permission. All written material is owned by Denise O, it will not be 'used' (sharing my article is different, it is acceptable and appreciated) without 'my' written permission.  Just keeping it real folks.:)

Thursday, February 14, 2013

Vegetarian Collard Greens: Done Mama's Way!

I do admit that I use to make my collard greens with some kind of pork added to them for flavor but, then I experimented with this dish and came up with a delicious yet healthier version.  Why not.


It's Easy...

Nothing can intimidate a cook more than trying to make some collard greens, yet it is a very simple process once you have learned just how to make this lovely pot of deliciousness.  There are just as many recipes as there are people that cook collard greens.  

Yes this is a vegetarian recipe and you might turn your nose up to that very fact but, I promise you if you make them my way, you too will have your family sopping up that pot liquor with a nice biscuit, as they finish up that bowl of greens you placed in front of them.

Ingredients...

4 pounds collard greens (fresh)
2 onions
1 bell pepper (red, yellow or orange)
3 stalks of celery
2 (Large) carrots
6 tablespoon olive oil
6 garlic cloves
3 teaspoons kosher salt
1 1/2 teaspoon smoked (sweet) paprika
1 1/2 teaspoons fresh cracked black pepper
1 bay leaf
2 tablespoons honey
A pinch or two of red pepper flakes

Wash those Greens 

When you get your bunches of collard greens home, cut off the bottom stems, leaving only the leaves.  Fill a 'cleaned' out sink (or use a 'big' bowl) with cold water, add your collard green leaves.  

I think of my hand as a washing machine and I start the rinse cycle on these greens, making sure I get all the dirt off.  You might have to drain your water and repeat this process if they are really dirty, as most are.

Cut UP

As I am removing my collard greens from the sink, I stack them in a neat pile, this will help when you go to cut them up.  

After you have stacked your collard greens, you then want to cut most of the stem and the (thick) vein that runs through your greens off.

Do this to each and every leaf but, as you start to get to the middle of your collards you will notice you have a few small leaves with hardly any stem.  

Don't worry about removing those stems, just lay them on the stack of those you have already taken the stems and veins out of.

Roll & Slice 

Yes as I am taking the stems and veins out of each leaf I stack them in another pile and I make the pile as net as I am able to.  This will help with this next step you are about to take.

Take about 5 leaves as a time, roll them up and cut cross ways, about one inch thick, repeat this process until you have finished all of your collard green leaves and set aside.

I am sure you will be amazed just how much of these greens you have after cutting them all up but, they will shrink down while cooking and you then will be amazed how little you have after they are cooked.

Did I hear "Veggies!" 

Slice your carrots into 1/2 inch rounds.

Dice your celery in a medium dice.  

Dice your onions in a medium dice.

Peel your garlic cloves cut in half, saving one whole for later usage.

Cut your bell pepper into strips. 

In a big frying pan, place 2 tablespoons of olive oil and then add your (minus garlic cloves) vegetables.  

Saute until they are soft but not to the point of turning brown.  Then add your garlic cloves and half your salt and saute for one minute.

Bundle UP 


Cheesecloth, you just gotta love this stuff, what a better way to add flavor and yet those worn out vegetables will be easy to take out.  At times it is so frustrating looking for that one bay leaf you pot in your pot of goodies, this way, you just scoop one bag out and no hiding seek is played on you.

Place your collard greens into your crockpot, yes it will be overflowing but as I have stated before, they will shrink down.  On a plate, place a double layer of cheesecloth, place your cooked vegetables and 1 bay leaf on the cheesecloth and then tie it off.  Grab the corner of one side of your cheesecloth and then the opposite side, tie up and repeat with the other two corners.  Place the bundle into your crockpot.

Flavor Town 

In the same (big) frying pan you saute'd your vegetables, on medium heat, add 2 tablespoons of olive oil.  

When the oil is hot add your whole garlic clove, paprika, cracked black pepper, pepper flakes and the rest of your salt, saute for about one minute. 

After one minute is up add three quarts of water and your honey, allow the water to come to a boil and then ladle the broth over your collard greens. 

I know you might be thinking, why not just pour the juice over it well, I use the ladle so I can control the flow of juice, I have a lot of collard greens in the pot and I want to make sure I am hitting all side of the crockpot, so as to shrink the greens down a bit, so the lid will fit just right.

Place your crockpot on high for 1 hour, stir your greens and then lower the temperature and cook on low for 6 hours.  After the 6 hours take out your cheesecloth, taste.  If it needs more salt or pepper, this is the time to add it.

That Easy folks


Yes, it is just that easy and delicious, oh lordy are they good.  Us folks here in the south call the broth that the collards, vegetables and spices 'pot liquor'.  So when you dish you up a bowl of these delicious collards, add some of that pot liquor to your bowl, I am sure you too will be sopping that goodness up.

Here are a few more of my vegetarian recipes...

Southern Style:  Boiled Peanuts

Potato Salad:  Done Mama's Way!

Vegetarian Eggplant Parmesan 

All photographs are the property of Denise O.  Do not use unless you get 'my' written permission. All written material is owned by Denise O, it will not be 'used' (sharing my article is different, it is acceptable and appreciated) without 'my' written permission.  Just keeping it real folks.:)

Monday, February 11, 2013

Succotash Stew: With a Side of Barbecue Chicken

Let's be real folks, we have all picked up an rotisserie chicken from the deli of our local supermarket.  After a long day at the job, it be either in your home and/or outside of the home, you need an easy yet healthy meal for your family.  This bird really doesn't cut it...


Gotta Love Southern Cooking


I love succotash, the combination of flavors and it can be made with any type of vegetables, although the truest form contains lima beans, corn, tomatoes, peppers, okra and some spices.

My family is not a big fan of okra so I have revised this recipe a bit.  I also like mine a bit on the wet side, so this is more of a stew than an original succotash but hey, that always seems to be my way, that is, do it my way.

To me that is what cooking is all about, take a basic recipe and then make it suit you and your family's likes.

Lima beans tend to be like every other bean, bland that is, until you add some spices & goodies to the pot and then you get a very tasty yet healthy dish your family will love.  Lima beans pack in some vitamin B's, potassium, iron and magnesium.  Not to even mention the fiber that is also an added ingredient we can all use.  They are also packed with protein, as most beans are.

Hit The Pantry


I know a lot of the so called 'experts' will tell you to stay away from canned foods, always go fresh, I say, not!  There are so many low sodium products on the market, also a lot of organic canned goods that are lovely on their own but, then add a few fresh ingredients and they become great.

I have noticed that I have started to cook more and more of these stews, as times are hard for a lot of us Americans.  A stew is ideal to make a little bit of ingredients go a long way.

Yes I use both fresh and pantry ingredients, to be quite honest, as I made this recipe up, I used what I had at the time.  I had no onions so I used onion powder.  As I have stated before, go by the basics but you add what you like.  Change up the beans, the vegetables or, make it my way and I assure you, you and your family will love this easy yet healthy meal.

What You Will Need...

2 pounds dried lima beans
3 carrots
2 stalks celery
3 bell peppers (I used 2 green & 1 red)
1 can tomatoes
1 can cream corn
1 teaspoon dried thyme
1 teaspoon sage
1 1/2 onion powder
1 teaspoon garlic powder
1 bay leaf
Canola oil
Butter
1 tablespoon sea salt
1 teaspoon cracked black pepper
1 rotisserie chicken
Barbecue sauce of your choice
Bread of your choice


Plan & Soak

There are two ways to start this dish, one is to soak your beans overnight or you can go by the quick boil method.  This day I used the quick boil method.  I added my beans to a dutch oven, add enough water so the level of water is around 2 inches above your beans.  Bring your beans to a boil, cover and allow your beans to sit for 2 hours, drain your beans and place back in your pot and continue with this recipe.

If you want to soak your beans overnight than by all means do so, just drain the water and then continue with this recipe.  If you are like I am, I do most of my work around the house while all others are asleep, I always have.

Cut your veggies the night before, also go ahead and roast your bell peppers.  Place your bell peppers in a bowl, cover.  Dice your carrots and celery, place in a bowl, cover and then place both bowls in the refrigerator. This will cut down on a lot of your time once you get home from work, a day of running errands and/or just a rough day working around the house.

Do not forget to pick up that rotisserie chicken at your supermarket deli.

Start Your Dinner...


The first thing I do is take the chicken off of the bones and set aside.  Place your drained lima beans in your dutch oven and then push the chicken carcass down into your beans.  I am not adding any bacon or the usual types of meat that a lot of southern cooks place in their pot of beans, so a little chicken fat will be just fine, as they say "fat adds flavor.".

Though there is such a thing as too much of a good thing, the chicken will add flavor with very little fat, just make sure you discard the skin.


Place your bell peppers on a cookie sheet and place under your broiler and allow the skin to char, I mean turn black, turning as needed.  When your bell peppers are charred all over, place in a bowl and put a lid on it, allow them to sit while you get the rest of the ingredients ready.  This will help the skins of your bell peppers to come off so much easier.

I find it is so much easier to buy peppers in bulk (when on sale) and then roast my bell peppers this way, they can be placed in a glass bowl, covered with a bit of olive oil and then cover the bowl, place in your refrigerator.

If I do not plan on using the broiled bell peppers right away then I place a few in a sandwich baggie, after the skin is taken off and then place all the baggies in a freezer bag, store in your freezer.  Then I am able to grab one bag at a time, depending how many peppers I need.

I like millions of people watch cooking shows and after one show I watched where it called for one jar of roasted red peppers, I like most bought the jar and what I found was.  I paid over 3 dollars for one roasted pepper in that jar.  That was when I first started to do my own roasted bell peppers and the savings were huge.  If I happen to be grilling the night I go grocery shopping, I just place the bell peppers on the grill itself and do the same process, turn as the skin chars and then place in a bowl and cover with a lid, so as to steam off the skin.

Roasting also brings out the sweetness of this vegetable and makes the taste of them, twice as good.


Okay the lima beans and chicken bones are in the pot, in a small dice cut up your celery, then cut your carrots into a medium dice, place in a frying pan, on medium with 1 1/2 tablespoons of canola oil added to your pan and saute your vegetables until soft.

While your carrots and celery are cooking, add your can of cream corn, peppers (peeled & chopped), onion powder, garlic powder, sage, thyme and a bay leaf to your pot of beans.  When your vegetables are done, add to your pot, cover your beans with some cold water and bring to a boil.  When your lima beans come to a boil, place a lid on the pot and turn down to a low simmer.

You can always add more water (if needed) as your stew is cooking, as they say, "It is easier to add than it is to take away.".  


Fry & Simmer


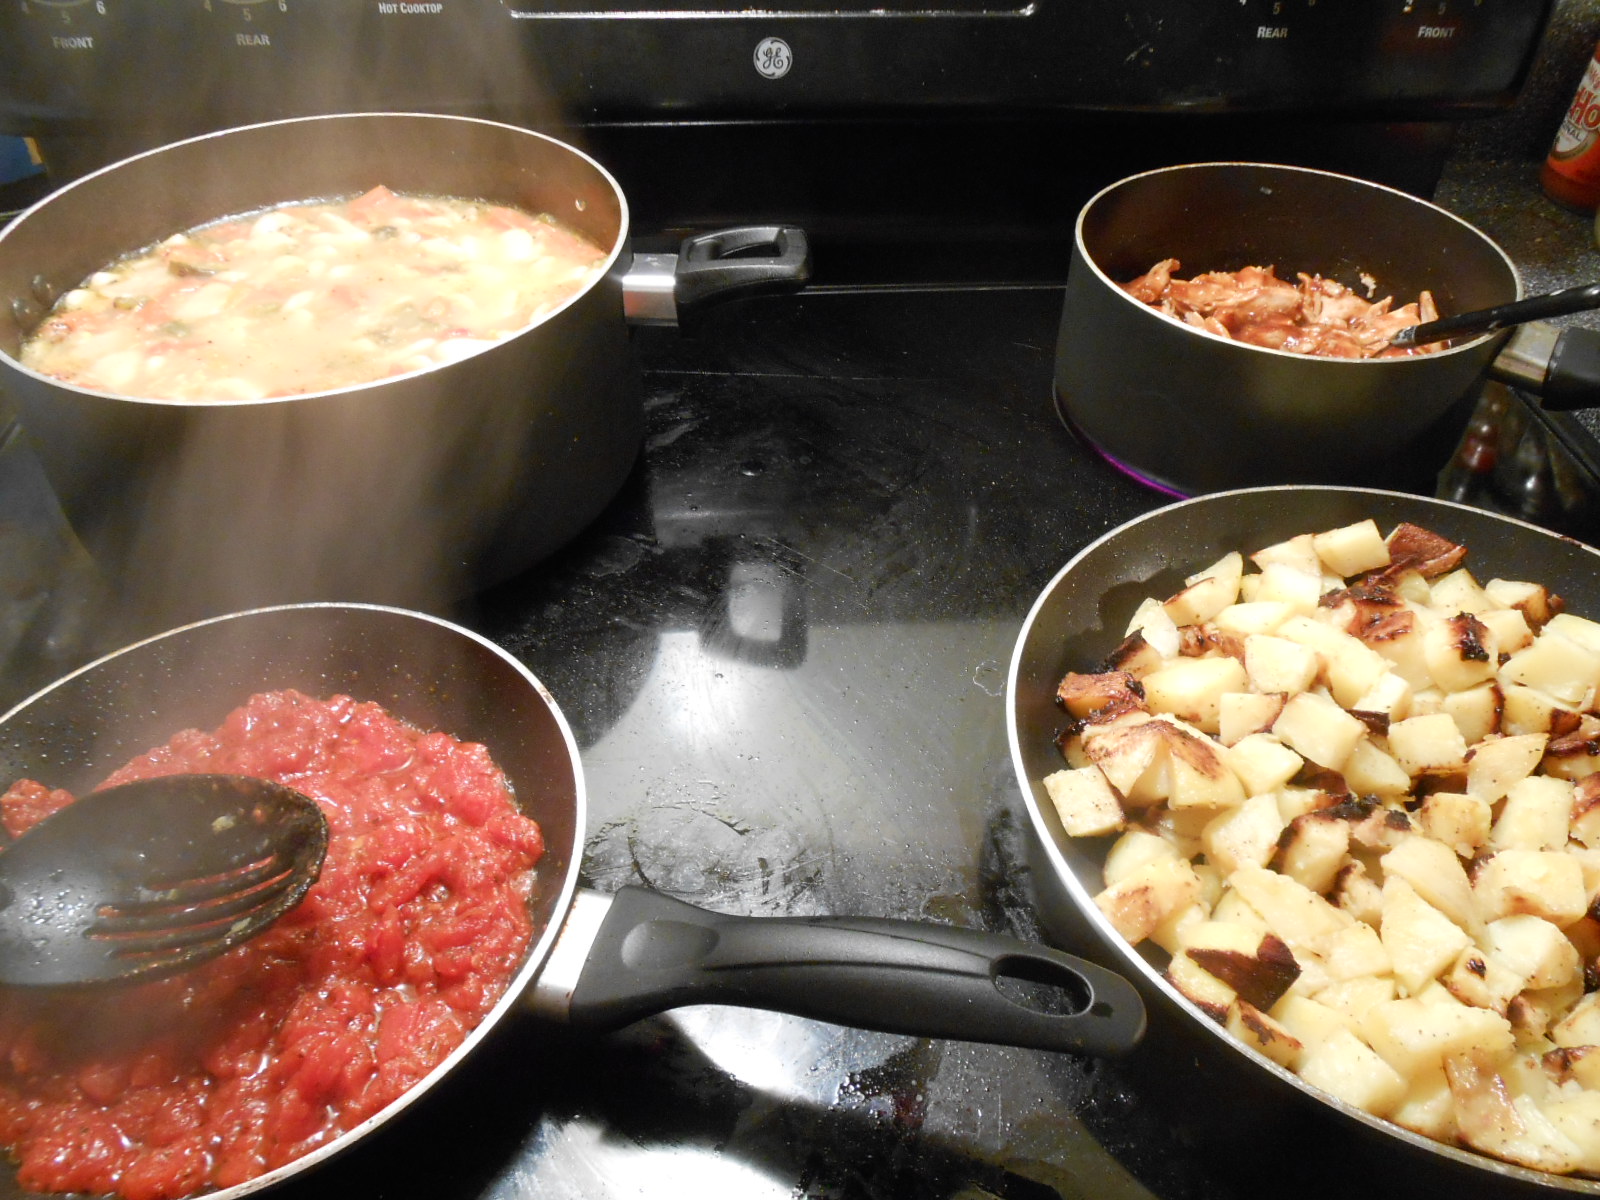
As your beans are simmering away for the first 30 minutes, peel and dice your potatoes, add to a bowl and cover with cold water.  Place your chicken in a sauce pan and add your favorite barbecue sauce and put on a very low simmer, no lid, stirring every now and then.

In the frying pan you cooked your carrots and celery in, add a tablespoon of canola oil and on medium heat, add your tomatoes (drained, save liquid), salt & pepper and saute for 4 to 5 minutes.  This is will brighten up your tomatoes and just add more goodness.

As you are stirring your tomatoes, make sure to scrap the bottom to get all the flavor left over from cooking your carrots and celery.  Add to your pot, replace the lid and continue to simmer.

Drain your potatoes and it is even a good idea to take a towel and dry them off as much as you can.  Place in a frying pan with 2 tablespoons of canola oil, salt and pepper.  Cook on medium high, turning every now and then.

How much salt you add is up to you, I find 1 tablespoon is perfect and lots of cracked black pepper is a must with this dish.  Remember, this is your stew so add as much as you like.

Like most beans, they do not always have a set time I can give you, I have made this stew and it has taken 1 1/2 hours to cook and yet this time, it only had taken 1 hour.  I have been told by one too many southern cooks this one secret and even though some 'experts' say it is not so...

I do not add salt or anything (tomatoes) with acid to my beans for the first 30 minutes.  The wonderful southern cooks I have had the honor of being in their kitchens say not to do so, so I don't.

When something is not broken folks, just don't try to fix it.

Yes, I Will Take 'this' Chicken...


I like my barbecue chicken served as an open faced sandwich and the bread I use is a slice of french bread. I will toast my bread in a frying pan with a thin coat of butter added to one side and toast it on a medium low heat, turn the bread over (adding no butter) and toast the other side.

The butter helps cut through that heavy barbecue sauce, helps with obtaining a golden piece of french bread and the crunchy texture is perfect for the spicy, sweet and creamy barbecue chicken.

Now why settle with a boring rotisserie chicken, I must ask, when all you have to do is think ahead and you too will have a delicious, yet healthy dinner your family will love.  I will eat on this succotash stew for the rest of the week for lunch, it only gets better after each day passes.

Please check out a few of my other recipes...

1 Chicken + 2 Dishes

Grilled Teriyaki Chicken

All photographs are the property of Denise O.  Do not use unless you get 'my' written permission. All written material is owned by Denise O, it will not be shared without 'my' written permission.  Just keeping it real folks.:)