I know a lot of us have had some awful carrot cakes in our time but, please let me show you, how you can make it so your family will be coming back for seconds, no doubt!
My carrot cake recipe came from my mama's recipe box, I have altered some things here and there but, it has not taken away the wonderful taste of this classic carrot cake. Another reason why I love this cake is because, it can be made as a breakfast bread, minus the frosting. It can be made in a 13X9 cake pan and topped with some icing.
Or you can go over the top and make a three layer cake, loaded with cream cheese icing and coconut. The third option is my son's favorite cake so much, it is now his birthday cake every year. Mind you, my son is not a big vegetable eater by the way.
Ingredients
2 cups white flour (no self rising)
2 cups carrots (grated)
2 cups granulated sugar
1 cup (can) crushed pineapple
1 cup (sweetened) coconut flakes
2 cups walnuts
1/2 cup buttermilk
1/4 cup canola oil
1/4 cup butter
2 (whole) large eggs
2 egg yolks
2 teaspoons baking soda
2 teaspoons (ground) cinnamon
1 1/2 teaspoons salt
1 teaspoon vanilla extract
1 ripe banana (mashed well with a fork before adding to your mixing bowl)
1/2 cups applesauce (homemade is better)
Frosting Ingredients
1 1/2 cups butter (unsalted)
2- 8 ounce packages cream cheese
5 cups powdered sugar
1 Tablespoon Vanilla extract
You can decorate your layer cake with (sweetened) coconut, nuts and I will even toast coconut and add that, it just depends are what I have and the mood I am in.
We're Off
Preheat your oven at 350 degrees. Grease and flour your cake pans and set aside.
In a big mixing bowl place your sifted flour, baking soda, cinnamon and salt, mix then set aside.
This next step is essential: Empty your can of crushed pineapple, open and place your pineapple into a mesh strainer. With the back of your wooded spoon press out as much of the pineapple juice as you are able.
If you skip this step, you will be baking this cake for a long time and only end up with a burnt cake, that still jiggles in the middle.
So please take the time to do this one step.
Let's Get Nutty...
My husband is so sweet he bought me a kitchenaid mixer but, if you do not have a stand up mixer than just use a bowl and a hand mixer, it will be just fine.
In your mixer/big bowl place your oil, eggs, sugar, buttermilk, carrots, coconut, pineapple, banana, applesauce and your vanilla extract. Mix on low for 2 minutes or until all ingredients are well incorporated.
I find it takes less time in a standing mixer. Add 1/2 your flour and mix for around 30 seconds and then add the other half of your flour, mix for another minute or until all flour is well incorporated.
Then stir your nuts into your batter with a spoon.
Pour in that Goodness
If you are making a sheet cake, pour your finished batter into a (well) greased & floured 13X9 cake pan, bake for 40 minutes or until a tooth pick is inserted in the middle of your cake and the toothpick comes out clean. Cool on a rack and then frost.
If you want to make this a breakfast cake, omit the frosting, serve warm. Making sure you have plenty of butter and honey to top it off.
Now if you are wanting to go all the way and make your carrot cake a bit fancy...
Pour your carrot cake batter into 3 'well' greased & floured 9 inch cake pans. Bake for 30 minutes or until a tooth pick is inserted into the middle of your cakes and the tooth pick comes out clean.
Start Your Engines...
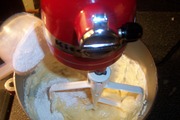
The day I am going to make this delicious cake, I take my butter and cream cheese out of the refrigerator and set them on my kitchen counter in the morning. You need room temperature butter and cream cheese, or you end up with a chunky and not so tasty icing.
Place your softened butter and cream cheese in your mixing bowl, mix for 2 minutes until both ingredients are well incorporated and starting to get a bit fluffy. Turn your mixer on low and start to add your powdered sugar, one cup at a time.
Allow the powdered sugar to absorb into the butter/cream cheese before adding the next half of cup. Repeat until all powdered sugar is gone.
When all your powdered sugar is incorporated add your vanilla extract, turn your mixer up to medium and mix for 2 minutes, until you get a fluffy consistency.
You only need half of your icing if you are making a sheet cake, place the other half into a container (I am using Alabama Tupperware) and place in the freezer for your next cake.
When you want to make another sheet cake, take out your icing, place it in the refrigerator over night to thaw out. When you are ready to use the icing, mix well.
Frosting 101
When I stated earlier that you are to grease and flour your cake pans, I really mean this when you are going to make this cake a 3 layer cake. By well greasing and flouring your pans, you are then able to take these lovely cakes out with ease.
Also very important is, make sure your cakes are cooled down completely.
Lay your first layer down on your serving plate. I do not cut this cake so as to make it even, I start with first layer and if I see that the first layer is a little lopsided, I will push it down, this cake if very forgiving.
When even then take 1/3 of your icing and ice the top and sides of that layer. Repeat until you have covered all three layers. I would usually tell you to place some wax/parchment paper around the cake, so you have a clean plate but, since you are adding coconut around the side, no one will spot a mistake and also, the coconut will hide any of the over flow of icing.
Make them Smile...
Yes there was a bit of work to be had but, all in all, putting a smile on the face of the ones you love it so well worth it. Once you have made this cake a few times, it really comes a easy recipe and one, I am sure you will be serving many times over.
Homemade Applesauce
When serving brunch this is a wonderful breakfast bread to add to your mix, also try adding...
Baked Potato Quiche: Mama's Got 'it' Loaded
All photographs are the property of Denise O. Do not use unless you get 'my' written permission. All written material is owned by Denise O, it will not be 'used' (sharing my article is different, it is acceptable and appreciated) without 'my' written permission. Just keeping it real folks.:)
This is my life now and in the past. I have made a lot of good decisions and I have made some mistakes and still do. I would like to share with you both of these times in my life, in the hope of being able to help you or those that you know. Plus I am a great cook. I have had dogs for decades and I know a little about these guys.
Showing posts with label southern. Show all posts
Wednesday, February 20, 2013
Carrot Cake: To frost or Not to frost?
Labels:
applesauce,
bread,
breakfast,
cake,
carrots,
coconut,
cream cheese,
Denise O,
dessert,
frosting,
icing,
nuts,
recipe,
recipes,
southern,
vegetarian
Monday, February 11, 2013
Succotash Stew: With a Side of Barbecue Chicken
Let's be real folks, we have all picked up an rotisserie chicken from the deli of our local supermarket. After a long day at the job, it be either in your home and/or outside of the home, you need an easy yet healthy meal for your family. This bird really doesn't cut it...
Gotta Love Southern Cooking
I love succotash, the combination of flavors and it can be made with any type of vegetables, although the truest form contains lima beans, corn, tomatoes, peppers, okra and some spices.
My family is not a big fan of okra so I have revised this recipe a bit. I also like mine a bit on the wet side, so this is more of a stew than an original succotash but hey, that always seems to be my way, that is, do it my way.
To me that is what cooking is all about, take a basic recipe and then make it suit you and your family's likes.
Lima beans tend to be like every other bean, bland that is, until you add some spices & goodies to the pot and then you get a very tasty yet healthy dish your family will love. Lima beans pack in some vitamin B's, potassium, iron and magnesium. Not to even mention the fiber that is also an added ingredient we can all use. They are also packed with protein, as most beans are.
Hit The Pantry
I know a lot of the so called 'experts' will tell you to stay away from canned foods, always go fresh, I say, not! There are so many low sodium products on the market, also a lot of organic canned goods that are lovely on their own but, then add a few fresh ingredients and they become great.
I have noticed that I have started to cook more and more of these stews, as times are hard for a lot of us Americans. A stew is ideal to make a little bit of ingredients go a long way.
Yes I use both fresh and pantry ingredients, to be quite honest, as I made this recipe up, I used what I had at the time. I had no onions so I used onion powder. As I have stated before, go by the basics but you add what you like. Change up the beans, the vegetables or, make it my way and I assure you, you and your family will love this easy yet healthy meal.
What You Will Need...
2 pounds dried lima beans
3 carrots
2 stalks celery
3 bell peppers (I used 2 green & 1 red)
1 can tomatoes
1 can cream corn
1 teaspoon dried thyme
1 teaspoon sage
1 1/2 onion powder
1 teaspoon garlic powder
1 bay leaf
Canola oil
Butter
1 tablespoon sea salt
1 teaspoon cracked black pepper
1 rotisserie chicken
Barbecue sauce of your choice
Bread of your choice
Plan & Soak
There are two ways to start this dish, one is to soak your beans overnight or you can go by the quick boil method. This day I used the quick boil method. I added my beans to a dutch oven, add enough water so the level of water is around 2 inches above your beans. Bring your beans to a boil, cover and allow your beans to sit for 2 hours, drain your beans and place back in your pot and continue with this recipe.
If you want to soak your beans overnight than by all means do so, just drain the water and then continue with this recipe. If you are like I am, I do most of my work around the house while all others are asleep, I always have.
Cut your veggies the night before, also go ahead and roast your bell peppers. Place your bell peppers in a bowl, cover. Dice your carrots and celery, place in a bowl, cover and then place both bowls in the refrigerator. This will cut down on a lot of your time once you get home from work, a day of running errands and/or just a rough day working around the house.
Do not forget to pick up that rotisserie chicken at your supermarket deli.
Start Your Dinner...
The first thing I do is take the chicken off of the bones and set aside. Place your drained lima beans in your dutch oven and then push the chicken carcass down into your beans. I am not adding any bacon or the usual types of meat that a lot of southern cooks place in their pot of beans, so a little chicken fat will be just fine, as they say "fat adds flavor.".
Though there is such a thing as too much of a good thing, the chicken will add flavor with very little fat, just make sure you discard the skin.
Place your bell peppers on a cookie sheet and place under your broiler and allow the skin to char, I mean turn black, turning as needed. When your bell peppers are charred all over, place in a bowl and put a lid on it, allow them to sit while you get the rest of the ingredients ready. This will help the skins of your bell peppers to come off so much easier.
I find it is so much easier to buy peppers in bulk (when on sale) and then roast my bell peppers this way, they can be placed in a glass bowl, covered with a bit of olive oil and then cover the bowl, place in your refrigerator.
If I do not plan on using the broiled bell peppers right away then I place a few in a sandwich baggie, after the skin is taken off and then place all the baggies in a freezer bag, store in your freezer. Then I am able to grab one bag at a time, depending how many peppers I need.
I like millions of people watch cooking shows and after one show I watched where it called for one jar of roasted red peppers, I like most bought the jar and what I found was. I paid over 3 dollars for one roasted pepper in that jar. That was when I first started to do my own roasted bell peppers and the savings were huge. If I happen to be grilling the night I go grocery shopping, I just place the bell peppers on the grill itself and do the same process, turn as the skin chars and then place in a bowl and cover with a lid, so as to steam off the skin.
Roasting also brings out the sweetness of this vegetable and makes the taste of them, twice as good.
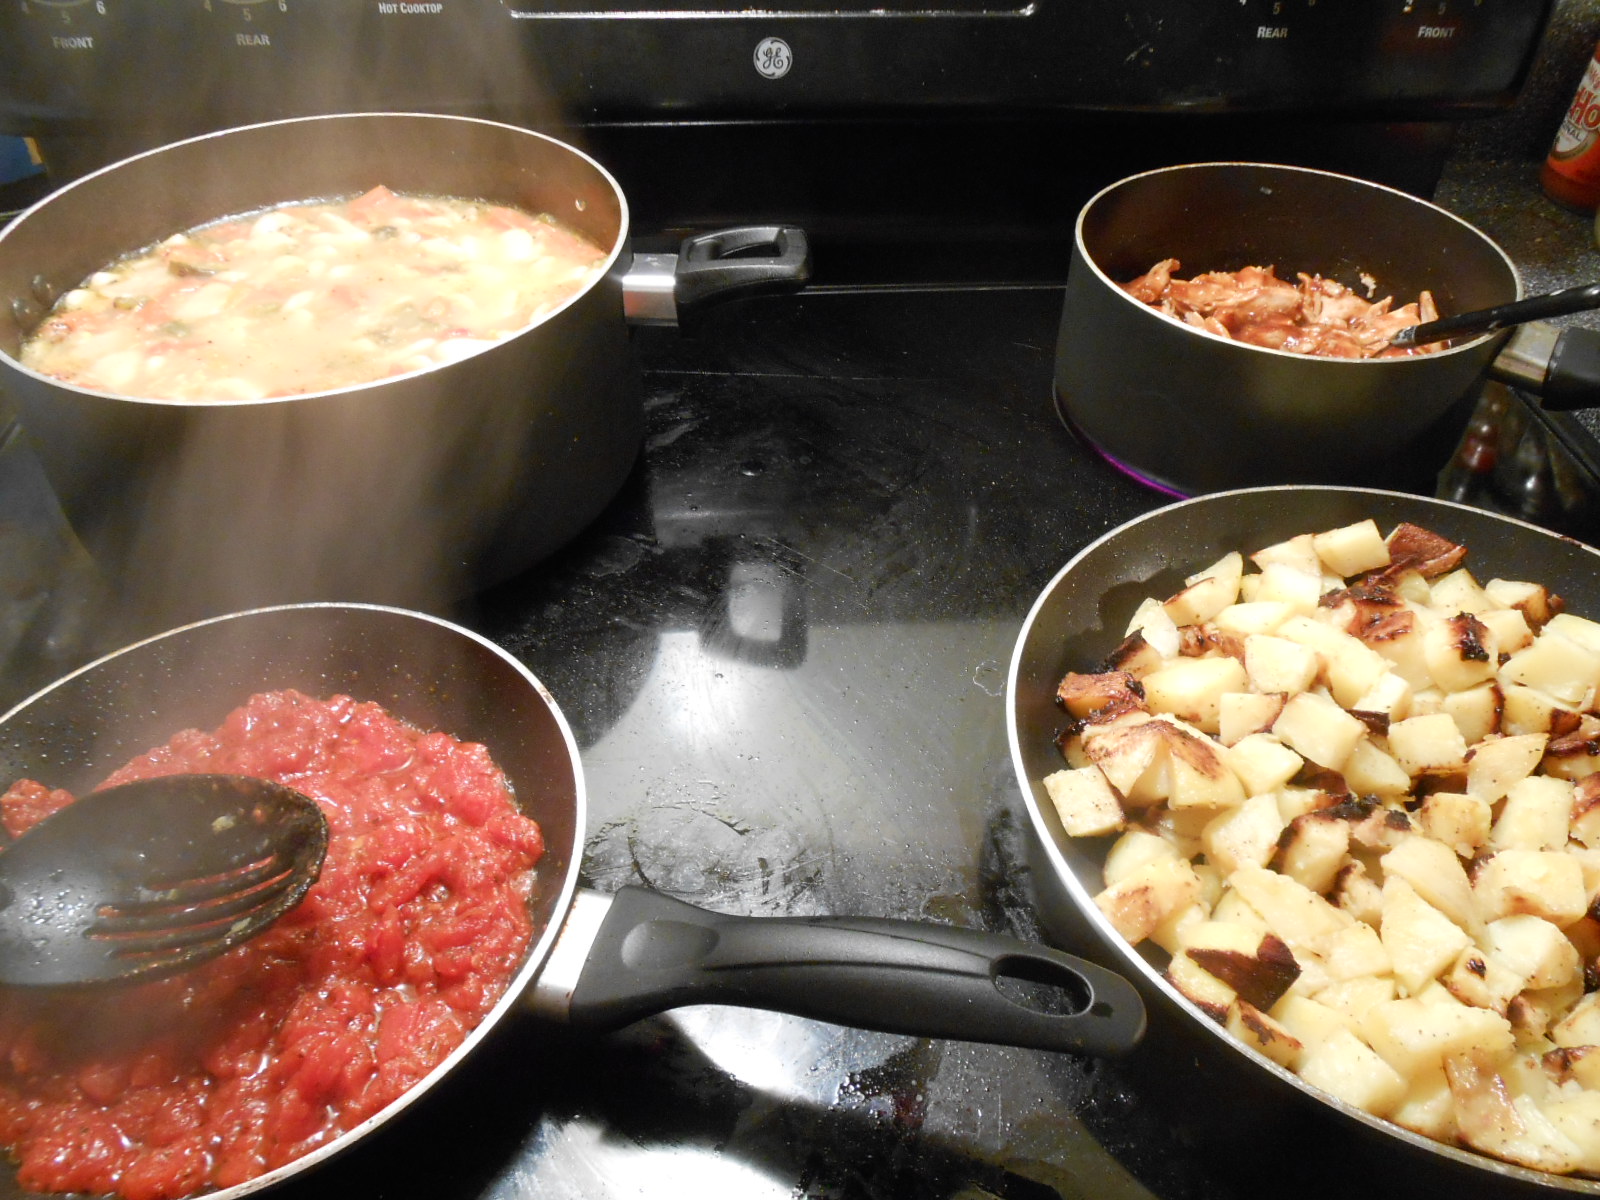
Okay the lima beans and chicken bones are in the pot, in a small dice cut up your celery, then cut your carrots into a medium dice, place in a frying pan, on medium with 1 1/2 tablespoons of canola oil added to your pan and saute your vegetables until soft.
While your carrots and celery are cooking, add your can of cream corn, peppers (peeled & chopped), onion powder, garlic powder, sage, thyme and a bay leaf to your pot of beans. When your vegetables are done, add to your pot, cover your beans with some cold water and bring to a boil. When your lima beans come to a boil, place a lid on the pot and turn down to a low simmer.
You can always add more water (if needed) as your stew is cooking, as they say, "It is easier to add than it is to take away.".
Fry & Simmer
As your beans are simmering away for the first 30 minutes, peel and dice your potatoes, add to a bowl and cover with cold water. Place your chicken in a sauce pan and add your favorite barbecue sauce and put on a very low simmer, no lid, stirring every now and then.
In the frying pan you cooked your carrots and celery in, add a tablespoon of canola oil and on medium heat, add your tomatoes (drained, save liquid), salt & pepper and saute for 4 to 5 minutes. This is will brighten up your tomatoes and just add more goodness.
As you are stirring your tomatoes, make sure to scrap the bottom to get all the flavor left over from cooking your carrots and celery. Add to your pot, replace the lid and continue to simmer.
Drain your potatoes and it is even a good idea to take a towel and dry them off as much as you can. Place in a frying pan with 2 tablespoons of canola oil, salt and pepper. Cook on medium high, turning every now and then.
How much salt you add is up to you, I find 1 tablespoon is perfect and lots of cracked black pepper is a must with this dish. Remember, this is your stew so add as much as you like.
Like most beans, they do not always have a set time I can give you, I have made this stew and it has taken 1 1/2 hours to cook and yet this time, it only had taken 1 hour. I have been told by one too many southern cooks this one secret and even though some 'experts' say it is not so...
I do not add salt or anything (tomatoes) with acid to my beans for the first 30 minutes. The wonderful southern cooks I have had the honor of being in their kitchens say not to do so, so I don't.
When something is not broken folks, just don't try to fix it.
Yes, I Will Take 'this' Chicken...
I like my barbecue chicken served as an open faced sandwich and the bread I use is a slice of french bread. I will toast my bread in a frying pan with a thin coat of butter added to one side and toast it on a medium low heat, turn the bread over (adding no butter) and toast the other side.
The butter helps cut through that heavy barbecue sauce, helps with obtaining a golden piece of french bread and the crunchy texture is perfect for the spicy, sweet and creamy barbecue chicken.
Now why settle with a boring rotisserie chicken, I must ask, when all you have to do is think ahead and you too will have a delicious, yet healthy dinner your family will love. I will eat on this succotash stew for the rest of the week for lunch, it only gets better after each day passes.
Please check out a few of my other recipes...
1 Chicken + 2 Dishes
Grilled Teriyaki Chicken
All photographs are the property of Denise O. Do not use unless you get 'my' written permission. All written material is owned by Denise O, it will not be shared without 'my' written permission. Just keeping it real folks.:)
I love succotash, the combination of flavors and it can be made with any type of vegetables, although the truest form contains lima beans, corn, tomatoes, peppers, okra and some spices.
My family is not a big fan of okra so I have revised this recipe a bit. I also like mine a bit on the wet side, so this is more of a stew than an original succotash but hey, that always seems to be my way, that is, do it my way.
To me that is what cooking is all about, take a basic recipe and then make it suit you and your family's likes.
Lima beans tend to be like every other bean, bland that is, until you add some spices & goodies to the pot and then you get a very tasty yet healthy dish your family will love. Lima beans pack in some vitamin B's, potassium, iron and magnesium. Not to even mention the fiber that is also an added ingredient we can all use. They are also packed with protein, as most beans are.
Hit The Pantry
I know a lot of the so called 'experts' will tell you to stay away from canned foods, always go fresh, I say, not! There are so many low sodium products on the market, also a lot of organic canned goods that are lovely on their own but, then add a few fresh ingredients and they become great.
I have noticed that I have started to cook more and more of these stews, as times are hard for a lot of us Americans. A stew is ideal to make a little bit of ingredients go a long way.
Yes I use both fresh and pantry ingredients, to be quite honest, as I made this recipe up, I used what I had at the time. I had no onions so I used onion powder. As I have stated before, go by the basics but you add what you like. Change up the beans, the vegetables or, make it my way and I assure you, you and your family will love this easy yet healthy meal.
What You Will Need...
2 pounds dried lima beans
3 carrots
2 stalks celery
3 bell peppers (I used 2 green & 1 red)
1 can tomatoes
1 can cream corn
1 teaspoon dried thyme
1 teaspoon sage
1 1/2 onion powder
1 teaspoon garlic powder
1 bay leaf
Canola oil
Butter
1 tablespoon sea salt
1 teaspoon cracked black pepper
1 rotisserie chicken
Barbecue sauce of your choice
Bread of your choice
Plan & Soak
There are two ways to start this dish, one is to soak your beans overnight or you can go by the quick boil method. This day I used the quick boil method. I added my beans to a dutch oven, add enough water so the level of water is around 2 inches above your beans. Bring your beans to a boil, cover and allow your beans to sit for 2 hours, drain your beans and place back in your pot and continue with this recipe.
If you want to soak your beans overnight than by all means do so, just drain the water and then continue with this recipe. If you are like I am, I do most of my work around the house while all others are asleep, I always have.
Cut your veggies the night before, also go ahead and roast your bell peppers. Place your bell peppers in a bowl, cover. Dice your carrots and celery, place in a bowl, cover and then place both bowls in the refrigerator. This will cut down on a lot of your time once you get home from work, a day of running errands and/or just a rough day working around the house.
Do not forget to pick up that rotisserie chicken at your supermarket deli.
Start Your Dinner...
The first thing I do is take the chicken off of the bones and set aside. Place your drained lima beans in your dutch oven and then push the chicken carcass down into your beans. I am not adding any bacon or the usual types of meat that a lot of southern cooks place in their pot of beans, so a little chicken fat will be just fine, as they say "fat adds flavor.".
Though there is such a thing as too much of a good thing, the chicken will add flavor with very little fat, just make sure you discard the skin.
Place your bell peppers on a cookie sheet and place under your broiler and allow the skin to char, I mean turn black, turning as needed. When your bell peppers are charred all over, place in a bowl and put a lid on it, allow them to sit while you get the rest of the ingredients ready. This will help the skins of your bell peppers to come off so much easier.
I find it is so much easier to buy peppers in bulk (when on sale) and then roast my bell peppers this way, they can be placed in a glass bowl, covered with a bit of olive oil and then cover the bowl, place in your refrigerator.
If I do not plan on using the broiled bell peppers right away then I place a few in a sandwich baggie, after the skin is taken off and then place all the baggies in a freezer bag, store in your freezer. Then I am able to grab one bag at a time, depending how many peppers I need.
I like millions of people watch cooking shows and after one show I watched where it called for one jar of roasted red peppers, I like most bought the jar and what I found was. I paid over 3 dollars for one roasted pepper in that jar. That was when I first started to do my own roasted bell peppers and the savings were huge. If I happen to be grilling the night I go grocery shopping, I just place the bell peppers on the grill itself and do the same process, turn as the skin chars and then place in a bowl and cover with a lid, so as to steam off the skin.
Roasting also brings out the sweetness of this vegetable and makes the taste of them, twice as good.
Okay the lima beans and chicken bones are in the pot, in a small dice cut up your celery, then cut your carrots into a medium dice, place in a frying pan, on medium with 1 1/2 tablespoons of canola oil added to your pan and saute your vegetables until soft.
While your carrots and celery are cooking, add your can of cream corn, peppers (peeled & chopped), onion powder, garlic powder, sage, thyme and a bay leaf to your pot of beans. When your vegetables are done, add to your pot, cover your beans with some cold water and bring to a boil. When your lima beans come to a boil, place a lid on the pot and turn down to a low simmer.
You can always add more water (if needed) as your stew is cooking, as they say, "It is easier to add than it is to take away.".
Fry & Simmer
In the frying pan you cooked your carrots and celery in, add a tablespoon of canola oil and on medium heat, add your tomatoes (drained, save liquid), salt & pepper and saute for 4 to 5 minutes. This is will brighten up your tomatoes and just add more goodness.
As you are stirring your tomatoes, make sure to scrap the bottom to get all the flavor left over from cooking your carrots and celery. Add to your pot, replace the lid and continue to simmer.
Drain your potatoes and it is even a good idea to take a towel and dry them off as much as you can. Place in a frying pan with 2 tablespoons of canola oil, salt and pepper. Cook on medium high, turning every now and then.
How much salt you add is up to you, I find 1 tablespoon is perfect and lots of cracked black pepper is a must with this dish. Remember, this is your stew so add as much as you like.
Like most beans, they do not always have a set time I can give you, I have made this stew and it has taken 1 1/2 hours to cook and yet this time, it only had taken 1 hour. I have been told by one too many southern cooks this one secret and even though some 'experts' say it is not so...
I do not add salt or anything (tomatoes) with acid to my beans for the first 30 minutes. The wonderful southern cooks I have had the honor of being in their kitchens say not to do so, so I don't.
When something is not broken folks, just don't try to fix it.
Yes, I Will Take 'this' Chicken...
I like my barbecue chicken served as an open faced sandwich and the bread I use is a slice of french bread. I will toast my bread in a frying pan with a thin coat of butter added to one side and toast it on a medium low heat, turn the bread over (adding no butter) and toast the other side.
The butter helps cut through that heavy barbecue sauce, helps with obtaining a golden piece of french bread and the crunchy texture is perfect for the spicy, sweet and creamy barbecue chicken.
Now why settle with a boring rotisserie chicken, I must ask, when all you have to do is think ahead and you too will have a delicious, yet healthy dinner your family will love. I will eat on this succotash stew for the rest of the week for lunch, it only gets better after each day passes.
Please check out a few of my other recipes...
1 Chicken + 2 Dishes
Grilled Teriyaki Chicken
All photographs are the property of Denise O. Do not use unless you get 'my' written permission. All written material is owned by Denise O, it will not be shared without 'my' written permission. Just keeping it real folks.:)
Monday, January 28, 2013
Southern Style Boiled Peanuts: Vegetarian
What is more southern than some boiled peanuts, let me answer for you, not much. These salty, hot and tender morsels, will make you want more after each and every bite.
Us folks here in the south have been raised on boiled peanuts. This is one reason why we do go see what we might be able to recycle at flea markets, I mean us Alabama folks are green minded folks. The 'What is old to another is new to us' mentality puts us in that category and also, use what you have to get the job done, helps also. Then if all else fails, get out the duct tape.
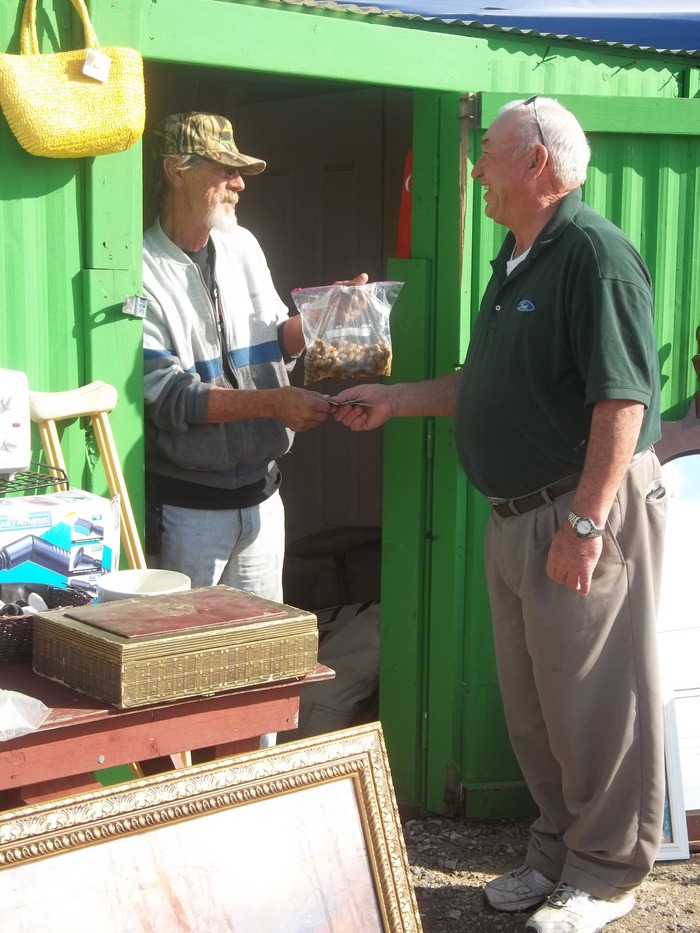
All flea markets around here have at least one person selling boiled peanuts, you are also able to see folks on the side of the road with a huge vat of hot boiled peanuts and a few vegetables to sell. Also, just because I now know how to make them myself, I still grab a bag every time we go to the flea market or I see a person selling them on the side of the road.
Our go to place for some boiled peanuts on the weekend is at the Ladonia Alabama Flea Market on highway 80. We always take the time to go see our friend Gary McNatt or better known as Pops.
The market is open 7 days a week but only sells food Friday - Sunday.
If you are not lucky enough to come and grab a bag at the flea market, then I will just have to bring the experience to you. You will find very few recipes that are as easy as this one. It is a great snack for your family but also, a great dish to add to any party.
Ingredients
2 pounds un-shelled raw peanuts
2 gallons water
2 cups kosher salt
Too Easy
Place some warm water and salt in a large plastic container, mix well so the salt will dissolve, to make your brine.
Add your peanuts to your brine. After most of your salt is dissolved.
You will notice that the peanuts will float to the top of your container.
To combat this problem, get a lid that will fit down inside the container, place on top of your peanuts.
Place two big cans in a plastic bag and place on top of your lid.
If you do not take this extra step, you will be cooking peanuts for days, just to make them tender.
Allow them to set for at least 16 hours.
After your peanuts have soaked, drain the peanuts and place in a large stock pot. Add 1 1/2 gallons of water and 1/4 cup of kosher salt to your pot. Bring to a boil.
When your peanuts come to a boil, cover, place on simmer and cook for roughly 4 1/2 hours, or until your peanuts are soft.
DIG IN!
After about 3 hours, take a peanut out of your pot and test it for texture. You want them to be soft but, not real mushy.
After at least 3 hours, every half hour after that, grab a peanut out of your pot, pop it in your mouth and see if it is done to your liking.
Some folks like their peanuts a bit more cooked than others, so you be the judge.
My last pot had taken me 5 hours to cook and yet, the time before it only had taken me 4 hours.
If your water is getting too low than add some more water to your pot, you do not want your peanuts drying out, they should be soft, wet and salty.
I place mine in ziploc baggies and toss them in the refrigerator. Make sure you add some of that broth you cooked the peanuts in to each bag, so the peanuts will not dry out.
For another southern style recipe please visit...
Potato Salad: Done Mama's Way!
To get to know us Alabama folks a bit better, visit my page...
Our (My) Business, Our (my) Employees & the Alabama Scanner
This dish would be a great treat on Super Bowl Sunday...
Super Bowl XLVII: Football, Food, Fun And Yes, Pranks!
All photographs are the property of Denise O. Do not use unless you get 'my' written permission. All written material is owned by Denise O, it will not be 'used' (sharing my article is different, it is acceptable and appreciated) without 'my' written permission. Just keeping it real folks.:)
Monday, April 2, 2012
Southern Style Potato Salad: Done Mama's Way!
My recipe for potato salad is nothing fancy but, I have learned a few tricks that makes this hearty and delicious potato salad. One that will have your family coming back for seconds.
This is not a diet conscious recipe and I do not apologize. I feel after a hard work week or a weekend barbecue with friends, there is no reason why you shouldn't indulge in such a delicious recipe.
Ingredients
5 pounds of russet potatoes
1 medium onion
1/2 cup dill pickles (I prefer claussen kosher dill)
1/4 cup of pickle juice
8 boiled eggs
3 cups mayonnaise
1 tablespoon yellow mustard.
2 teaspoon salt
1 teaspoon cracked black pepper
sweet paprika
Potato & Eggs
Peel your potatoes and then place them in a bowl of cold water. Set aside. In a sauce pan, place 8 eggs. Add enough cold water, so the water covers your eggs. Bring to a boil on high heat.
Boil for 4 minutes. After 4 minutes are up, cover and take the pan off the heat for 10 minutes.
After 10 minutes are up, take your cover off, drain your eggs and let them cool in a ice bath.
Cut Taters
Cut your potatoes in 1/2, then cut each half in 3 pieces. Place them in a 5 quart pot.
Cover with cold water. Turn your burner on high and bring to a boil.
Boil on high for 15 minutes.
Drain your potatoes in a colander.
As in nature, all potatoes are not created equal...
Put it All Together
After your potatoes and eggs are cooled, add your mayonnaise mixture, diced eggs and mix well. After it is well incorporated, cover and place in your refrigerator. For two hours.
Two hours later, take your potato salad out of the refrigerator, mix well and spoon into your serving bowl.
Make it Look Pretty
Now, all you have to do is, dig in!
This would be a wonderful dish to serve next to some barbecue on Super Bowl Sunday...
Super Bowl XXVII: Football, Food, Fun and Yes, Pranks!
Try it next to a delicious...
Club Sandwich
All photographs are the property of Denise O. Do not use unless you get 'my' written permission. All written material is owned by Denise O, it will not be 'used' (sharing my article is different, it is acceptable and appreciated) without 'my' written permission. Just keeping it real folks.:)
This is not a diet conscious recipe and I do not apologize. I feel after a hard work week or a weekend barbecue with friends, there is no reason why you shouldn't indulge in such a delicious recipe.
I can not think of a better way of using up all those Easter eggs and serve this at your next barbecue and you will be the hit of the party.
Ingredients
5 pounds of russet potatoes
1 medium onion
1/2 cup dill pickles (I prefer claussen kosher dill)
1/4 cup of pickle juice
8 boiled eggs
3 cups mayonnaise
1 tablespoon yellow mustard.
2 teaspoon salt
1 teaspoon cracked black pepper
sweet paprika
Potato & Eggs
Peel your potatoes and then place them in a bowl of cold water. Set aside. In a sauce pan, place 8 eggs. Add enough cold water, so the water covers your eggs. Bring to a boil on high heat.
Boil for 4 minutes. After 4 minutes are up, cover and take the pan off the heat for 10 minutes.
After 10 minutes are up, take your cover off, drain your eggs and let them cool in a ice bath.
Cut Taters
Cut your potatoes in 1/2, then cut each half in 3 pieces. Place them in a 5 quart pot.
Cover with cold water. Turn your burner on high and bring to a boil.
Boil on high for 15 minutes.
Drain your potatoes in a colander.
As in nature, all potatoes are not created equal...
Just try to make each piece the same size, the best you can, it will be just fine.
Peel & Chop
Finely dice your onions and pickles. Set aside in a 'big' mixing bowl. Pour your kosher salt over the onions and pickles.
When your potatoes are done, pour your 'drained' (hot) potatoes over your pickles and onions.
In a small mixing bowl add mayonnaise, mustard, pickle juice, cracked black pepper.
Mix until well incorporated. Place a cover on top of both bowls and set them both in the refrigerator for thirty minutes.
Peel your eggs. Take six of your eggs, cut them in quarters and then dice roughly. Place your diced eggs in a bowl, cover and set in your refrigerator.
Take one egg slice it, place it on a saucer, cover and put in the refrigerator. If you mess up with this egg, you have a extra boiled egg to cut up. If you don't need the extra egg then just eat it, they are good for you.
Put it All Together
After your potatoes and eggs are cooled, add your mayonnaise mixture, diced eggs and mix well. After it is well incorporated, cover and place in your refrigerator. For two hours.
Two hours later, take your potato salad out of the refrigerator, mix well and spoon into your serving bowl.
Make it Look Pretty
Place your egg slices on top of your potato salad. Lightly spinkle with sweet paprika (optional).
Now, all you have to do is, dig in!
This would be a wonderful dish to serve next to some barbecue on Super Bowl Sunday...
Super Bowl XXVII: Football, Food, Fun and Yes, Pranks!
Try it next to a delicious...
Club Sandwich
All photographs are the property of Denise O. Do not use unless you get 'my' written permission. All written material is owned by Denise O, it will not be 'used' (sharing my article is different, it is acceptable and appreciated) without 'my' written permission. Just keeping it real folks.:)
Labels:
boiled eggs,
Denise O,
eggs,
food,
potato,
recipe,
recipes,
salad,
southern,
vegetarian
Subscribe to:
Posts (Atom)


.jpeg)


.jpeg)

.jpeg)
.jpeg)


.jpeg)
.jpeg)