Showing posts with label vegetarian. Show all posts

Wednesday, February 20, 2013

Carrot Cake: To frost or Not to frost?

I know a lot of us have had some awful carrot cakes in our time but, please let me show you, how you can make it so your family will be coming back for seconds, no doubt!


My carrot cake recipe came from my mama's recipe box, I have altered some things here and there but, it has not taken away the wonderful taste of this classic carrot cake.  Another reason why I love this cake is because, it can be made as a breakfast bread, minus the frosting.  It can be made in a 13X9 cake pan and topped with some icing.

Or you can go over the top and make a three layer cake, loaded with cream cheese icing and coconut.  The third option is my son's favorite cake so much, it is now his birthday cake every year.  Mind you, my son is not a big vegetable eater by the way.

Ingredients

2 cups white flour (no self rising)

2 cups carrots (grated)

2 cups granulated sugar

1 cup (can) crushed pineapple

1 cup (sweetened) coconut flakes

2 cups walnuts

1/2 cup buttermilk

1/4 cup canola oil

1/4 cup butter

2 (whole) large eggs

2 egg yolks

2 teaspoons baking soda

2 teaspoons (ground) cinnamon

1 1/2 teaspoons salt

1 teaspoon vanilla extract

1 ripe banana (mashed well with a fork before adding to your mixing bowl)

1/2 cups applesauce (homemade is better)

Frosting Ingredients

1 1/2 cups butter (unsalted)

2- 8 ounce packages cream cheese

5 cups powdered sugar

1 Tablespoon Vanilla extract

You can decorate your layer cake with (sweetened) coconut, nuts and I will even toast coconut and add that, it just depends are what I have and the mood I am in.

We're Off


Preheat your oven at 350 degrees.  Grease and flour your cake pans and set aside.

In a big mixing bowl place your sifted flour, baking soda, cinnamon and salt, mix then set aside.

This next step is essential:  Empty your can of crushed pineapple, open and place your pineapple into a mesh strainer.  With the back of your wooded spoon press out as much of the pineapple juice as you are able.

If you skip this step, you will be baking this cake for a long time and only end up with a burnt cake, that still jiggles in the middle.  

So please take the time to do this one step.

Let's Get Nutty...


My husband is so sweet he bought me a kitchenaid mixer but, if you do not have a stand up mixer than just use a bowl and a hand mixer, it will be just fine.

In your mixer/big bowl place your oil, eggs, sugar, buttermilk, carrots, coconut, pineapple, banana, applesauce and your vanilla extract. Mix on low for 2 minutes or until all ingredients are well incorporated.

I find it takes less time in a standing mixer. Add 1/2 your flour and mix for around 30 seconds and then add the other half of your flour, mix for another minute or until all flour is well incorporated.

Then stir your nuts into your batter with a spoon.

Pour in that Goodness
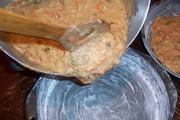

If you are making a sheet cake, pour your finished batter into a (well) greased & floured 13X9 cake pan, bake for 40 minutes or until a tooth pick is inserted in the middle of your cake and the toothpick comes out clean.  Cool on a rack and then frost.

If you want to make this a breakfast cake, omit the frosting, serve warm.  Making sure you have plenty of butter and honey to top it off.

Now if you are wanting to go all the way and make your carrot cake a bit fancy...

Pour your carrot cake batter into 3 'well' greased & floured 9 inch cake pans.  Bake for 30 minutes or until a tooth pick is inserted into the middle of your cakes and the tooth pick comes out clean.

Start Your Engines...
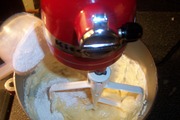

The day I am going to make this delicious cake, I take my butter and cream cheese out of the refrigerator and set them on my kitchen counter in the morning.  You need room temperature butter and cream cheese, or you end up with a chunky and not so tasty icing.

Place your softened butter and cream cheese in your mixing bowl, mix for 2 minutes until both ingredients are well incorporated and starting to get a bit fluffy. Turn your mixer on low and start to add your powdered sugar, one cup at a time.

Allow the powdered sugar to absorb into the butter/cream cheese before adding the next half of cup. Repeat until all powdered sugar is gone.

When all your powdered sugar is incorporated add your vanilla extract, turn your mixer up to medium and mix for 2 minutes, until you get a fluffy consistency.

You only need half of your icing if you are making a sheet cake, place the other half into a container (I am using Alabama Tupperware) and place in the freezer for your next cake.

When you want to make another sheet cake, take out your icing, place it in the refrigerator over night to thaw out.  When you are ready to use the icing, mix well.

Frosting 101


When I stated earlier that you are to grease and flour your cake pans, I really mean this when you are going to make this cake a 3 layer cake.  By well greasing and flouring your pans, you are then able to take these lovely cakes out with ease.

Also very important is, make sure your cakes are cooled down completely.

Lay your first layer down on your serving plate.  I do not cut this cake so as to make it even, I start with first layer and if I see that the first layer is a little lopsided, I will push it down, this cake if very forgiving.

When even then take 1/3 of your icing and ice the top and sides of that layer.  Repeat until you have covered all three layers.  I would usually tell you to place some wax/parchment paper around the cake, so you have a clean plate but, since you are adding coconut around the side, no one will spot a mistake and also, the coconut will hide any of the over flow of icing.

Make them Smile...


Yes there was a bit of work to be had but, all in all, putting a smile on the face of the ones you love it so well worth it.  Once you have made this cake a few times, it really comes a easy recipe and one, I am sure you will be serving many times over.

Homemade Applesauce

When serving brunch this is a wonderful breakfast bread to add to your mix, also try adding...

Baked Potato Quiche:  Mama's Got 'it' Loaded

All photographs are the property of Denise O.  Do not use unless you get 'my' written permission. All written material is owned by Denise O, it will not be 'used' (sharing my article is different, it is acceptable and appreciated) without 'my' written permission.  Just keeping it real folks.:)

Homemade Applesauce: Orange, Apples & Cinnamon, Oh My!

Very few aromas make a home warm and inviting than the smell of apples and cinnamon cascading throughout your home.  This applesauce recipe smells heavenly while cooking. It also is a very delicious dish on its own or added to a recipe to bring that recipe over the top.


Ingredients

8 apples (I used 6 red delicious and 2 granny smith)
1 cup apple juice
1/3 cup sugar (white)
1/2 cup honey (I used orange blossom)
1/2 cup orange marmalade
1/3 cup packed brown sugar
2 cinnamon sticks
1 lemon
pinch of salt

I like to use organic fruits, I know they are usually more expensive but, I will let you in on one of my secrets. When I see organic apples on sale and the price is the same as regular apples, I stock up.  I then will make a double or even a triple batch of this applesauce, as it stores well in your freezer.

AKA Alabama Tupperware

I place some (enough to feed my family as a side dish)  in freezer container so I can just take it out the night before I am going to serve my family say a, pork chop dinner.  I will also measure some of the applesauce out and place in quart side freezer bags, so I can take one out when I want to make the other recipes I use this applesauce in.

Peelingsssssss

In 2 large bowl add some cold water, cut your lemon in half.  Squeeze one half of your lemon in each bowl and add the halves to each bowl.

As you are peeling your apples, allow the peels to drop into one of your bowls.

When your apple is peeled, place your apple into the other bowl.  Continue until you have peeled all your apples and they are resting in your lemony water bath.

Yes I do have a surprise for the peelings, just set them aside.

Cut & Scoop

After you have peeled all of your apples, cut your apples in half.

Take a melon scoop and take out the core. Then cut each half of your apple and them them in quarters.

Place all your cut apples into the lemon water, until you are ready.

By placing them in the lemon water will help them from browning.

This whole procedure will only take about 10 minutes but, your apples (if not placed in the lemon water) will brown with a minute or two, so do not skip this step.

Pour that Liquid Gold


Place your cut up apples, apple juice, sugar, ornage marmalade, honey and 2 cinnamon sticks into your crockpot.  Place the lid on your crockpot, set your crockpot on high for 1 hour, stir, replace the lid and lower the setting on your crockpot to 'low'.

Cook for 4 hours, stirring every hour.  After 4 hours is up then add your brown sugar, mix well and then replace the lid.  With the temperature off, allow your apple sauce to sit for 15 minutes, mix and serve.

No Waste Here


If you are like I am and want to use most 'all' of the produce you have bought then continue with this next step.  You can make your bundles while the applesauce is simmering away.

Take your apple peels and split them up into six lunch baggies (no sense in using heavy duty bags) and set aside.

Then go to your spice cabinet and take out some of those whole cloves that have been just sitting on your shelf since the last holiday season, add 6 or 7 cloves per baggie.

Then place one cinnamon stick into each baggie, close the baggies up, place all our baggies into a gallon size freezer bag and place into your freezer.

Now when company is coming or you see that ever too curious neighbor heading your way, then grab a bag, place into a small sauce pan, take out a baggie and dump the contents into your pan.  After the apple peels & goodies have come to a boil, turn down the heat to a low simmer and just let that lovely aroma cascade all through your house and then you have delicious smelling home.

I Can Hardly Wait to Dig in


Now, I am sure you will find many ways to use this applesauce.  Mixed into a bit of yogurt for breakfast, placed into a cake recipe to replace most of the oil.  Just keep in mind the flavors you have going on in your pot and then allow your imagination take you away.

Yes  I do use this applesauce in a few of my dishes but, my absolute favorite way of eating this sweet goodness is sitting in a bowl next to a few pieces of ham and a side of green bean casserole.  Which ever way you want to use/serve this applesauce, I am sure your family will enjoy ever bite of it and ask for more.

The recipes I add my homemade applesauce to is...

Carrot Cake:  Done Three Ways!

Southern Style: Sweet Potato Casserole

All photographs are the property of Denise O.  Do not use unless you get 'my' written permission. All written material is owned by Denise O, it will not be 'used' (sharing my article is different, it is acceptable and appreciated) without 'my' written permission.  Just keeping it real folks.:)

Thursday, February 14, 2013

Vegetarian Collard Greens: Done Mama's Way!

I do admit that I use to make my collard greens with some kind of pork added to them for flavor but, then I experimented with this dish and came up with a delicious yet healthier version.  Why not.


It's Easy...

Nothing can intimidate a cook more than trying to make some collard greens, yet it is a very simple process once you have learned just how to make this lovely pot of deliciousness.  There are just as many recipes as there are people that cook collard greens.  

Yes this is a vegetarian recipe and you might turn your nose up to that very fact but, I promise you if you make them my way, you too will have your family sopping up that pot liquor with a nice biscuit, as they finish up that bowl of greens you placed in front of them.

Ingredients...

4 pounds collard greens (fresh)
2 onions
1 bell pepper (red, yellow or orange)
3 stalks of celery
2 (Large) carrots
6 tablespoon olive oil
6 garlic cloves
3 teaspoons kosher salt
1 1/2 teaspoon smoked (sweet) paprika
1 1/2 teaspoons fresh cracked black pepper
1 bay leaf
2 tablespoons honey
A pinch or two of red pepper flakes

Wash those Greens 

When you get your bunches of collard greens home, cut off the bottom stems, leaving only the leaves.  Fill a 'cleaned' out sink (or use a 'big' bowl) with cold water, add your collard green leaves.  

I think of my hand as a washing machine and I start the rinse cycle on these greens, making sure I get all the dirt off.  You might have to drain your water and repeat this process if they are really dirty, as most are.

Cut UP

As I am removing my collard greens from the sink, I stack them in a neat pile, this will help when you go to cut them up.  

After you have stacked your collard greens, you then want to cut most of the stem and the (thick) vein that runs through your greens off.

Do this to each and every leaf but, as you start to get to the middle of your collards you will notice you have a few small leaves with hardly any stem.  

Don't worry about removing those stems, just lay them on the stack of those you have already taken the stems and veins out of.

Roll & Slice 

Yes as I am taking the stems and veins out of each leaf I stack them in another pile and I make the pile as net as I am able to.  This will help with this next step you are about to take.

Take about 5 leaves as a time, roll them up and cut cross ways, about one inch thick, repeat this process until you have finished all of your collard green leaves and set aside.

I am sure you will be amazed just how much of these greens you have after cutting them all up but, they will shrink down while cooking and you then will be amazed how little you have after they are cooked.

Did I hear "Veggies!" 

Slice your carrots into 1/2 inch rounds.

Dice your celery in a medium dice.  

Dice your onions in a medium dice.

Peel your garlic cloves cut in half, saving one whole for later usage.

Cut your bell pepper into strips. 

In a big frying pan, place 2 tablespoons of olive oil and then add your (minus garlic cloves) vegetables.  

Saute until they are soft but not to the point of turning brown.  Then add your garlic cloves and half your salt and saute for one minute.

Bundle UP 


Cheesecloth, you just gotta love this stuff, what a better way to add flavor and yet those worn out vegetables will be easy to take out.  At times it is so frustrating looking for that one bay leaf you pot in your pot of goodies, this way, you just scoop one bag out and no hiding seek is played on you.

Place your collard greens into your crockpot, yes it will be overflowing but as I have stated before, they will shrink down.  On a plate, place a double layer of cheesecloth, place your cooked vegetables and 1 bay leaf on the cheesecloth and then tie it off.  Grab the corner of one side of your cheesecloth and then the opposite side, tie up and repeat with the other two corners.  Place the bundle into your crockpot.

Flavor Town 

In the same (big) frying pan you saute'd your vegetables, on medium heat, add 2 tablespoons of olive oil.  

When the oil is hot add your whole garlic clove, paprika, cracked black pepper, pepper flakes and the rest of your salt, saute for about one minute. 

After one minute is up add three quarts of water and your honey, allow the water to come to a boil and then ladle the broth over your collard greens. 

I know you might be thinking, why not just pour the juice over it well, I use the ladle so I can control the flow of juice, I have a lot of collard greens in the pot and I want to make sure I am hitting all side of the crockpot, so as to shrink the greens down a bit, so the lid will fit just right.

Place your crockpot on high for 1 hour, stir your greens and then lower the temperature and cook on low for 6 hours.  After the 6 hours take out your cheesecloth, taste.  If it needs more salt or pepper, this is the time to add it.

That Easy folks


Yes, it is just that easy and delicious, oh lordy are they good.  Us folks here in the south call the broth that the collards, vegetables and spices 'pot liquor'.  So when you dish you up a bowl of these delicious collards, add some of that pot liquor to your bowl, I am sure you too will be sopping that goodness up.

Here are a few more of my vegetarian recipes...

Southern Style:  Boiled Peanuts

Potato Salad:  Done Mama's Way!

Vegetarian Eggplant Parmesan 

All photographs are the property of Denise O.  Do not use unless you get 'my' written permission. All written material is owned by Denise O, it will not be 'used' (sharing my article is different, it is acceptable and appreciated) without 'my' written permission.  Just keeping it real folks.:)

Sunday, February 3, 2013

Super Bowl XLVII: Football, Fun, Tips and Yes, Appetizers! Part 5

We have gotten through the pranks, gifts and Meat.  Now it is time for appetizers.  Must I point this out (again) this is Super Bowl Sunday, we are Americans, we will be eating, Period!

For those that know me, I just might surprise you when I reveal one of my tricks...


Yes it is already made goodies from the deli I use, Sue Me!

In my defense, our publix supermarket has a great deal.  If you buy 6 items from their list, pepsi products, tortilla chips, lays chips and Salsa, then you get 10 dollars off of any platter, I opted for the Cuban sandwich platter.

They will 'never' Know...


Grab a pretty platter and a small bowl that will fit in the middle, add what you like as a little nibble, I decided on some sweet grape tomatoes.

Lettuce you will find, will become your best friend as you start to throw parties.

Lettuce makes your goodies pop, it is colorful and when your snacks are being gobbled up, your platter will not look old, dirty and empty.

Place your bowl in the middle and then start by laying a single layer of some loose leaf lettuce.

After you have placed your lettuce all around your platter, start adding your sandwiches, or just about any appetizer you might be serving.

Remember, all sandwiches are not make equal so work with the sandwiches until you get the look you find most appealing.

No Shame in this Game Folks!


Now you tell me, would you dig into that platter or what.  I was intending to buy the other ingredients any ways, so why not add a few more bunches to the bunch.

Man Rule: Take those extra steps to help the hostess/host, not only by buying the platter (remember the discount), assemble it and just hear all the women say "He sure is a very thoughtful man, hmm.".  You just might get lucky if you are with someone or there might be some single folks that you will then impress.  You meet your life partner today.

Sandwiches...

Serving sandwiches for appetizers is a economical and easy way to prepare.  I suggest you use a platter that you will have to replenish, rather than putting them all out at once.  When you do this, you end up with dried out bread and yes, this sandwich contains mayonnaise, do not take the chance of the mayonnaise going bad.

My Turkey, Bacon & Ham club would be a great edition to every party.  When you yourself make the sandwiches, instead of just laying cold cuts out, you then are able to stretch that meat a bit more and actually give your guest a better tasting snack to nibble on.

Spread it!

I make a very yummy green olive spread, it is a take off of a southern favorite, pimento cheese spread.  It is very easy to make and you might even have the ingredients in your refrigerator already.

You will need:

2 8 oz. packages cream cheese

2 1/2 cups cheddar cheese (I prefer sharp)

1 cup green olives

2/3 cup mayonnaise

1 tablespoon (or more if desired) Thai chili sauce

Salt & Fresh cracked black pepper to taste

Let's Get Started...


Place the cream cheese, mayonnaise and mix.  Make sure you take the time to mix it well.

Add your Thai chili sauce, salt and pepper to the bowl and mix for 1 minutes, you want all the seasoning to penetrate each and every bit of creamy goodness.

I will just let the mixer go for as long as it takes for me to shred my cheese and chop my olives.

Make sure to drain your olives well and also, I prefer to start with a whole olive, instead of those already chopped up, they contain less liquid, we don't want a runny dip.

Add to the Mix


After you have chopped your olives and grated your cheese, add to your mix and then mix until it is just incorporated.  You want the cheese and olives to mix in well but, not to the point that people have no idea what those green and red specks are.  We don't want to scare our guest.

Grab that lettuce...


A platter, your favorite crackers.  Maybe cube up some cheese, pierce it with a toothpick and place a black or green olive on top.  I am sure this will be a very busy location for your guest.

Easy Folks...

I am sure you have many other delicious recipes in your recipe box and I am sure they are loved by all but every now and then, just make a bit of a change, try something new.  Maybe just one dish at a time.


Also, grab the chips and dip, they are just fine and your guest will appreciate the thought.

I will not be making any homemade salsa, it will be coming out of a jar.  I find that there are so many delicious salsa products out there, so why make extra work for yourself.

Also please remind them, you did supply them with a wonderful gift, as you hand them a EFF-IT ball, they will not even give it a second thought.

Are 'you' Ready for Some Football!


I know I am and Bugg, Sweet Tee are ready for the fight.   As  have said previously, if you need supplies, delegate, this is not the time to be a martyr.  Make them work!

Super Bowl:  Part 1

Super Bowl: Part 2

Super Bowl:  Part 3

Super Bowl:  Part 4

Super Bowl:  Part 6

Turkey, Ham & Bacon Club Recipe

Once again, sorry about the typos, I am trying folks, working on real time here folks.  I will not give up! I have 1 more article to go... Drinks

All photographs are the property of Denise O.  Do not use unless you get 'my' written permission. All written material is owned by Denise O, it will not be 'used' (sharing my article is different and acceptable) without 'my' written permission.  Just keeping it real folks.:)

Monday, January 28, 2013

Southern Style Boiled Peanuts: Vegetarian

What is more southern than some boiled peanuts, let me answer for you, not much.  These salty, hot and tender morsels, will make you want more after each and every bite.


Us folks here in the south have been raised on boiled peanuts.  This is one reason why we do go see what we might be able to recycle at flea markets, I mean us Alabama folks are green minded folks.   The 'What is old to another is new to us' mentality puts us in that category and also, use what you have to get the job done, helps also. Then if all else fails, get out the duct tape.

All flea markets around here have at least one person selling boiled peanuts, you are also able to see folks on the side of the road with a huge vat of hot boiled peanuts and a few vegetables to sell.  Also, just because I now know how to make them myself, I still grab a bag every time we go to the flea market or I see a person selling them on the side of the road.

Our go to place for some boiled peanuts on the weekend is at the Ladonia Alabama Flea Market on highway 80.  We always take the time to go see our friend Gary McNatt or better known as Pops.

The market is open 7 days a week but only sells food Friday - Sunday.

If you are not lucky enough to come and grab a bag at the flea market, then I will just have to bring the experience to you.  You will find very few recipes that are as easy as this one.  It is a great snack for your family but also, a great dish to add to any party.

Ingredients

2 pounds un-shelled raw peanuts

2 gallons water

2 cups kosher salt

Too Easy


Place some warm water and salt in a large plastic container, mix well so the salt will dissolve, to make your brine.


Add your peanuts to your brine.  After most of your salt is dissolved.

You will notice that the peanuts will float to the top of your container.

To combat this problem, get a lid that will fit down inside the container, place on top of your peanuts.

Place two big cans in a plastic bag and place on top of your lid.

If you do not take this extra step, you will be cooking peanuts for days, just to make them tender.

Allow them to set for at least 16 hours.

After your peanuts have soaked, drain the peanuts and place in a large stock pot.  Add 1 1/2 gallons of water and 1/4 cup of kosher salt to your pot.  Bring to a boil.

When your peanuts come to a boil, cover, place on simmer and cook for roughly 4 1/2 hours, or until your peanuts are soft.

DIG IN!


After about 3 hours, take a peanut out of your pot and test it for texture.  You want them to be soft but, not real mushy.

After at least 3 hours, every half hour after that, grab a peanut out of your pot, pop it in your mouth and see if it is done to your liking.

Some folks like their peanuts a bit more cooked than others, so you be the judge.

My last pot had taken me 5 hours to cook and yet, the time before it only had taken me 4 hours.

If your water is getting too low than add some more water to your pot, you do not want your peanuts drying out, they should be soft, wet and salty.

I place mine in ziploc baggies and toss them in the refrigerator.  Make sure you add some of that broth you cooked the peanuts in to each bag, so the peanuts will not dry out.

For another southern style recipe please visit...

Potato Salad: Done Mama's Way!

To get to know us Alabama folks a bit better, visit my page...

Our (My) Business, Our (my) Employees & the Alabama Scanner

This dish would be a great treat on Super Bowl Sunday...

Super Bowl XLVII:  Football, Food, Fun And Yes, Pranks!

All photographs are the property of Denise O.  Do not use unless you get 'my' written permission. All written material is owned by Denise O, it will not be 'used' (sharing my article is different, it is acceptable and appreciated) without 'my' written permission.  Just keeping it real folks.:)

Thursday, April 12, 2012

Vegetarian Eggplant Parmesan

Make Do

Having been around some of the best cooks (in my opinion) and having the privilege to be able to watch in admiration as they make the most delicious plates of Italian cuisine, has helped me become a better cook.

One of the things I do love about Italian cooks is, they use what they have and not only make do but, make it mouthwatering good.

This recipe is dedicated to all the wonderful cooks that have brought me to the point I am and also, instilling in me to never stop watching and learning.

Ingredients

2 large eggplants 

1/3 cup olive oil (you might need a bit more or, less)

1 1/3 cups grated parmesan


Vegetable broth 

3 cups water
2 carrots
1 onion
5 green onion tops
1/4 red bell pepper
1/2 teaspoon cracked black pepper
1/2 teaspoon salt

Filling

2 cups cottage cheese (I use small curd)
1/2 cup romano cheese
5 green onions
2 egg yolk
1/4 teaspoon salt
1/4 teaspoon cracked black pepper

Tomato Sauce

1 can crushed tomatoes (28 ounce can)
1 cup diced tomatoes ( you can use can or fresh)
1/2 red bell pepper
1/2 cup vegetable broth
2 carrots diced
2 (heaping) tablespoons tomato paste
1 tablespoon honey
2 teaspoons dried Italian seasoning
1 teaspoon crushed red pepper
1 1/2 teaspoons salt

I use the tops of the 5 green onions and just throw them in my broth pot.  I only use half the broth for this recipe, by all means, put the rest in the fridge for another night.


Easy As 1, 2, 3

Place your water in a medium size sauce pan. No need in cutting up the green onion tops and cut your onion in half and add to the pot

Grate two carrots straight into the pot.  Add red bell pepper and cracked black pepper, bring to a boil.

When your broth comes to a boil, lower the heat to medium high heat. 

Cook for 30 minutes. You should have about 1 cup of broth left over.  All ovens are different, you might have to cook it a bit longer so it will reduce enough.  You are intensifying the flavors.

When your 30 minutes are up, add your salt and mix. 

Drain your brother through a strainer, while catching the broth in a bowl and set aside.


Fill'er up Please

 Go ahead and make your filling.

Place your cottage cheese into a mesh strainer. Take a fork and press out as much liquid as you can. 

Dice your green onions and saute on medium heat for 2 minutes. Until they become soft.

Grate your romano cheese and while you are grating. Why not grate the parmesan you will be needing later on in the recipe.

In a medium mixing bowl add the cottage cheese, green onions, romano cheese and cracked black pepper. Mix well.

Taste and then add your salt, it might take a bit more or less of salt. As romano cheese will differ and some are more salty than others. 

Then add the egg yolks, mix well, cover with plastic wrap and set aside.


Filling A bit Saucy

I find it is best to have all your ingredients ready to go at this point.

Dice up your carrots and cut your red bell pepper into big chunks. 

Set them on the stove, with your broth, Ready to go.

In a medium size sauce pan, add 1 tablespoon of olive oil to your pan, turn your burner on medium high heat.

Add your tomato paste to your pan and cook for 2 minutes.  Stirring the tomato paste the whole time, pressing the tomato paste with the back of a wooden spoon.


More Sauce Please


Add bell pepper, carrots and red pepper flakes to the tomato paste and continue cooking for 2 minutes, on medium heat.

Add your vegetable broth and Italian herbs to the pan and cook on high for 5 minutes.  After 5 minutes, add your crushed tomatoes, diced tomatoes and honey. 

Bring back to a boil then turn your stove down to a simmer, cover and cook for 1 hour. 

Make sure you stir your sauce every now and then, so your sauce will not scorch. 

When your hour is up, add your salt and mix well. Set aside.


Fry: Not!

Preheat oven to 400 degrees

I have made many eggplant parmesan casseroles and I find that after I did completed the step they wanted me to and most of the time it would turn out a bit oily. 

Eggplant is a sponge for any liquid, so please keep this in mind.

That is why I use my oven, so I am able to cut down on how much oil I use.  

Take two cookie sheets, spread olive oil on the bottom of both sheets.  Slice your eggplant in 1/4 inch rounds.

Place the rounds on your cookie sheets, then on the tops of your eggplant, with a papper towel, baste the tops of your eggplant. Please just baste the top once and move on because, if you blink, the eggplant will absorb all the oil and look dry on top. 

Place in the oven for 9 minutes. Take out of the oven and set aside. Lower the temperature of your oven to 350 degrees.


Assembly Line


I am using a 12 x 7 casserole dish.  Grab your filling, sauce, eggplant and set up your station.

Place 1 cup of the tomato sauce on bottom of your casserole dish.  Place a layer of your eggplant.

Keep the layers com'in


Top the eggplant with your filling.

Add the tomato sauce on top on the filling.

Top with 1/3 cup parmesan cheese. 

Top with another layer of eggplant. Top with half of your remaining sauce and sprinkle with 1/3 cup of parmesan cheese.

If you want to add more cheese to your casserole, feel free to do so.   

I am only giving you the basics, you use your imagination,  make it your own if you like.


Finishing Touches

On your third and final layer.

Place a layer of eggplant.

Pour the remainder of your tomato sauce on the eggplant.

Top with the remaining parmesan cheese.

Cover the casserole dish with tin foil, making sure it doesn't touch the top of your casserole and bake at 350 degrees, for 45 minutes.

After 45 minutes are up, take your tin foil off and bake for another 15 minutes. 

This will help you acheive a crispy goodness of cheese on top of your casserole.


As my Grandson would say "TA-DA!"


Now, make sure you allow your eggplant casserole to sit on the stove for at least 20 minutes. This way it has had some time to firm up and it will be easier to cut. I know it will be very hard for you to have to wait but, it will be well worth it.


Add a salad or a nice piece of your favorite bread and dig in.


Please try out another of my favorite recipes...


Baked Potato Quiche:  Mama's got it Loaded!


All photographs are the property of Denise O.  Do not use unless you get 'my' written permission. All written material is owned by Denise O, it will not be 'used' (sharing my article is different and acceptable) without 'my' written permission.  Just keeping it real folks.:)

Wednesday, April 4, 2012

Lentil & Vegetable soup: Vegetarian or Ham Bone!

I like recipes that give you a choice of either having it vegetarian or as a meat dish and still taste good, no matter which way you choose to make this recipe.


When I was young, I loved to visit my grandmothers home in New Mexico, she was such a accomplished cook and the aromas that were always floating in the air in her home made my stomach growl.   Not just in my Grandma's house but, all through the neighborhood. One thing l learned from grandma is, do not add everything to your pot at once.  Let the flavors develop, one step at a time and an also a good broth is key. 

If you would like this soup to be vegetarian, omit the ham bone. Replace the 4 1/2 cups of water with vegetable stock, homemade or store bought, your choice.


Ingredients

1 ham bone
1 1/2 cups dried lentils
1 onion
1/2 cup grated carrots
1 cup of chopped carrots
2 14.5 oz cans of fire roasted tomatoes
2 14.75 oz cans of cream corn
2 cups frozen spinach, thawed
1 cup rice
1/2 green bell pepper
1 teaspoon chopped garlic 
2 teaspoon dried oregano 
1 tablespoon chili powder 
1/2 teaspon ground cumin
1 bay leaf
1 1/2 tablespoons salt
1 teaspoon freshly ground black pepper
2 teaspoons sweet paprika
3/4 teaspoon ground chipotle peppers
3 tablespoons honey
6 tablespoons Olive oil
1/4 teaspoon lemon pepper
A pinch or two of red pepper flakes


It will be Just fine...


Do not let the amount of ingredients deter you from making this lovely soup. 

It is really easy and I will guide you along the way.  Soon this soup will become second nature to you. 

Basically there are very few steps you must go through and in the end, it will be well worth it, I promise.

Dice onion and garlic.

Grate 1/2 cup of carrots. 

Slice carrots and set aside.

Grab all your spices and head to the stove.

Fry it up in a Pan

On medium heat, add 3 tablespoons of olive oil to a 5 quart pot. 

When the oil gets hot, add your onions, grated carrots and saute for 3 minutes or until your vegetables have started to brown around the edges. 

After 3 minutes, add to your pot, garlic, chili powder, cumin, sweet paprika, black pepper, chipolte pepper, dried oregano, 1 tablespoon of salt and red pepper flakes. 

Saute on medium heat for 1 minutes.


Ham it up!


Place your ham bone in your pot, cover the ham bone with 4 1/2 quarts of water and add your bay leaf. 

Bring your soup base to a boil, turn down the heat to low , cover and cook for 1 hour.

Take off your lid, turn your burner up to medium high, cook for 20 minutes.


Almost There


After your 30 minutes is up, remove the ham bone.  When the ham bone has cooled a bit, you can remove the bits of ham and add to your soup.

Add 2 cans of tomatoes and 2 cans of cream corn.  Add your sliced carrots.  Cook for 30 minutes, on medium heat.


Add those Lentils

Rinse your lentils in a strainer, add your lentils and 1/2 of a green bell pepper (or any other bell pepper you have) to your pot. 

Bring to a boil. When it comes to a boil, turn the heat down to a simmer.

Cover with your lid and simmer for 40 minutes.

After 40 minutes, add your rice and bring to a boil. When your rice reaches a boil. place your lid back on your pot, turn your burner on low and simmer for 20 minutes or until your rice is cooked all the way through..


While your Soup is Simmering


Place your spinach in some cheesecloth and squeeze the water out of your spinach.

In a frying pan on medium heat, add 3 tablespoons of olive oil. When the pan gets hot, add your spinach. 

Saute your spinach for 3 minutes. 

Watch out, the spinach might splatter and it does hurt a bit.   Add your lemon pepper, 1/2 tablespoon of salt, honey and saute for 2 more minutes.

Add your spinach to the soup. Cook your soup on medium heat for 5 minutes and then serve.


If you don't have lemon pepper available then just add the zest of 1/2 of a lemon and about 1/2 teaspoon (or more if you like) of 'fresh' cracked black pepper.


Dig on in!


With a nice piece of bread of your choosing, this lentil soup makes a wonderful meal. Soups and stews are very healthy and I find them economically low for a large amount of hot goodness. 

For a few more of my soup/stew recipes, please visit my pages...

Succotash Stew 
Potato, Squash & Carrot Soup

All photographs are the property of Denise O.  Do not use unless you get 'my' written permission. All written material is owned by Denise O, it will not be 'used' (sharing my article is different, it is acceptable and appreciated) without 'my' written permission.  Just keeping it real folks.:)