Just add some potatoes & Carrots and you can not go wrong with this lovely dinner. It might even make you feel a bit Irish on March 17, 2013.
I tip my Hat to the Irish
Yes, I must tip my hat to those wonderful people and this one classic that is served around America on St. Patrick's Day each year since I have been here on earth. Mama would cook her scrumptious corned beef dinner, each and 'every' year. I still make my plate the exact same way as I did when I was growing up.
Mustard on my corned beef, butter on my potatoes and carrots and malted vinegar on my cabbage, this combination has yet to fail and as I dive into it now, I am reminded of the warmth of Mama's kitchen.
I will cook two corned beefs this year, as I always do. This dish only gets better, as it ages and also, I make a mean corned beef sandwich, even if I must say so myself. At times I will make a pan of some corned beef hash, a few poached eggs topped over it and of course bread of your choice for sopping up all that goodness.
Do not pass up this chance to surprise your family and allow me to guide you through to a corned beef meal you will serve your family all throughout the year, not just on St. Patrick's Day.
Ingredients

6 pound Corned Beef
1 pound carrots
5 pounds red potatoes
1 large head of cabbage
The package of spices that comes with your corned beef.
Of course your corned beef more than likely will not be six pounds, so please go by the cooking times on your corned beef package, I do, always.
When I am cooking my second corned beef, I will also add one pound of carrots and the spices to my pan, just as I did for the one I will be using for my dinner, just minus the carrots, cabbage and potatoes.
I 'am' Braising
Preheat your oven to 350 degrees. Look on your corned beef package, check the weight of your beef and also look at the cooking (time) directions and 'write it down' how long it will take to cook 'your' corned beef, important!
Once you open your package of corned beef, you will 'not' want to dive into the trash can to 'once again' check and see how long that thing must cook.
Place your pound of carrots on the bottom of your roasting pan (I use a throw away pan) and as you are placing the carrots, turn them so you have as even of a bed of carrots as you are able to achieve.
Lay your corned beef on top of your bed of carrots and sprinkle your corned beef with the seasoning packet that came with your corned beef on top and around your corned beef.
Add enough water so as the water level reaches half way up your roasting pan. Cover your roasting pan with tin foil and seal tightly.
I use organic carrots, so I don't peel my carrots. Now if the hubby makes a mistake and grabs non-organic carrots I do peel those carrots. This is your dish, I am just giving you the basics, you make it your own.
Feeling 'more' Irish
Thirty minutes before your corned beef is done, peel your potatoes or if you do like the peelings on, by all means keep the skins on, just wash them before adding them to your pot. I peel the potatoes because Mama did and I like my St. Patrick's dinner, just as she made it for me when I was a child.
You will notice that your bag of red potatoes will (almost always) have a few bigger ones than the rest of the bag, just cut those in half. Keep your (peeled) potatoes in a bowl of cold bowl of water and set aside. Cut your cabbage into eight wedges. After taking off the very end of the core at the bottom of your cabbage I leave the rest of the core, I find it cooks down just fine and keeps your edges intake.
When your corned beef and carrots are done, remove from the pan, place your corned beef and carrots on a platter and cover with the tin foil you used to cover your roasting pan. Place the corned beef/carrot broth into a stock pot, add your potatoes and cabbage, wedging the cabbage around the potatoes. Add enough water to cover your potatoes and cabbage, bring to boil, cover and allow to simmer for thirty minutes.
After thirty minutes, place your carrots into your pot and on top of the vegetable, place some sliced corned beef, cover and simmer for five minutes.
Can You 'cut' it
I Don't know why but, cutting meat always seems to scare a lot of folks.
My friends, it is very easy once you learn the secrets.
I love my corned beef cut on the thin side. I will see which way the lines go through the meat, this is called 'the grain'.
You want to cut across the grain', as pictured on your right. You might have to turn your meat around a few times, as the grain is not even throughout this cut of meat.
If you cut with the grain then, it will still taste good but, you will be gnawing on that meat for awhile.
Yes, I cooked my other pan of corned beef right along with the one I cooked for dinner. You see, I love a good corned beef sandwich and as I have stated before, this dish only gets better with time so why not have more.
I will add my carrots from my extra corned beef to the stock pot also, it seems we never have enough carrots. Make sure to test your potatoes every 10 minutes and adjust the time you add your corned beef and carrots back into your pot. All you are doing is warming up your carrots and corned beef. Place on a platter and serve.
Open Wide!
What can I say, is this mouthwatering or what, I say "You bet 'your bippy' it is.". I am sure your family too will enjoy this meal as much as mine does. Around St. Patrick's Day is the best time to buy corned beef and that is when I will stock up, so as to warm up my family's Sunday's throughout the year.
I also would love to share with you my favorite corned beef sandwich recipe, the slaw is what makes it...
Corned Beef Sandwich: Honey, Mustard & Grape Seed Oil Slaw
For another lovely, delicious and warm meal for your family, please visit...
Lentil Soup: Vegetarian 'or' Ham Bone!
All photographs are the property of Denise O. Do not use unless you get 'my' written permission. All written material is owned by Denise O, it will not be 'used' (sharing my article is different, it is acceptable and appreciated) without 'my' written permission. Just keeping it real folks.:)
This is my life now and in the past. I have made a lot of good decisions and I have made some mistakes and still do. I would like to share with you both of these times in my life, in the hope of being able to help you or those that you know. Plus I am a great cook. I have had dogs for decades and I know a little about these guys.
Showing posts with label carrots. Show all posts
Monday, February 25, 2013
Wednesday, February 20, 2013
Carrot Cake: To frost or Not to frost?
I know a lot of us have had some awful carrot cakes in our time but, please let me show you, how you can make it so your family will be coming back for seconds, no doubt!
My carrot cake recipe came from my mama's recipe box, I have altered some things here and there but, it has not taken away the wonderful taste of this classic carrot cake. Another reason why I love this cake is because, it can be made as a breakfast bread, minus the frosting. It can be made in a 13X9 cake pan and topped with some icing.
Or you can go over the top and make a three layer cake, loaded with cream cheese icing and coconut. The third option is my son's favorite cake so much, it is now his birthday cake every year. Mind you, my son is not a big vegetable eater by the way.
Ingredients
2 cups white flour (no self rising)
2 cups carrots (grated)
2 cups granulated sugar
1 cup (can) crushed pineapple
1 cup (sweetened) coconut flakes
2 cups walnuts
1/2 cup buttermilk
1/4 cup canola oil
1/4 cup butter
2 (whole) large eggs
2 egg yolks
2 teaspoons baking soda
2 teaspoons (ground) cinnamon
1 1/2 teaspoons salt
1 teaspoon vanilla extract
1 ripe banana (mashed well with a fork before adding to your mixing bowl)
1/2 cups applesauce (homemade is better)
Frosting Ingredients
1 1/2 cups butter (unsalted)
2- 8 ounce packages cream cheese
5 cups powdered sugar
1 Tablespoon Vanilla extract
You can decorate your layer cake with (sweetened) coconut, nuts and I will even toast coconut and add that, it just depends are what I have and the mood I am in.
We're Off
Preheat your oven at 350 degrees. Grease and flour your cake pans and set aside.
In a big mixing bowl place your sifted flour, baking soda, cinnamon and salt, mix then set aside.
This next step is essential: Empty your can of crushed pineapple, open and place your pineapple into a mesh strainer. With the back of your wooded spoon press out as much of the pineapple juice as you are able.
If you skip this step, you will be baking this cake for a long time and only end up with a burnt cake, that still jiggles in the middle.
So please take the time to do this one step.
Let's Get Nutty...
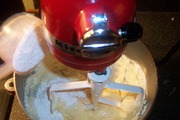
My husband is so sweet he bought me a kitchenaid mixer but, if you do not have a stand up mixer than just use a bowl and a hand mixer, it will be just fine.
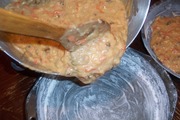
In your mixer/big bowl place your oil, eggs, sugar, buttermilk, carrots, coconut, pineapple, banana, applesauce and your vanilla extract. Mix on low for 2 minutes or until all ingredients are well incorporated.
I find it takes less time in a standing mixer. Add 1/2 your flour and mix for around 30 seconds and then add the other half of your flour, mix for another minute or until all flour is well incorporated.
Then stir your nuts into your batter with a spoon.
Pour in that Goodness
If you are making a sheet cake, pour your finished batter into a (well) greased & floured 13X9 cake pan, bake for 40 minutes or until a tooth pick is inserted in the middle of your cake and the toothpick comes out clean. Cool on a rack and then frost.
If you want to make this a breakfast cake, omit the frosting, serve warm. Making sure you have plenty of butter and honey to top it off.
Now if you are wanting to go all the way and make your carrot cake a bit fancy...
Pour your carrot cake batter into 3 'well' greased & floured 9 inch cake pans. Bake for 30 minutes or until a tooth pick is inserted into the middle of your cakes and the tooth pick comes out clean.
Start Your Engines...
The day I am going to make this delicious cake, I take my butter and cream cheese out of the refrigerator and set them on my kitchen counter in the morning. You need room temperature butter and cream cheese, or you end up with a chunky and not so tasty icing.
Place your softened butter and cream cheese in your mixing bowl, mix for 2 minutes until both ingredients are well incorporated and starting to get a bit fluffy. Turn your mixer on low and start to add your powdered sugar, one cup at a time.
Allow the powdered sugar to absorb into the butter/cream cheese before adding the next half of cup. Repeat until all powdered sugar is gone.
When all your powdered sugar is incorporated add your vanilla extract, turn your mixer up to medium and mix for 2 minutes, until you get a fluffy consistency.
You only need half of your icing if you are making a sheet cake, place the other half into a container (I am using Alabama Tupperware) and place in the freezer for your next cake.
When you want to make another sheet cake, take out your icing, place it in the refrigerator over night to thaw out. When you are ready to use the icing, mix well.
Frosting 101
When I stated earlier that you are to grease and flour your cake pans, I really mean this when you are going to make this cake a 3 layer cake. By well greasing and flouring your pans, you are then able to take these lovely cakes out with ease.
Also very important is, make sure your cakes are cooled down completely.
Lay your first layer down on your serving plate. I do not cut this cake so as to make it even, I start with first layer and if I see that the first layer is a little lopsided, I will push it down, this cake if very forgiving.
When even then take 1/3 of your icing and ice the top and sides of that layer. Repeat until you have covered all three layers. I would usually tell you to place some wax/parchment paper around the cake, so you have a clean plate but, since you are adding coconut around the side, no one will spot a mistake and also, the coconut will hide any of the over flow of icing.
Make them Smile...
Yes there was a bit of work to be had but, all in all, putting a smile on the face of the ones you love it so well worth it. Once you have made this cake a few times, it really comes a easy recipe and one, I am sure you will be serving many times over.
Homemade Applesauce
When serving brunch this is a wonderful breakfast bread to add to your mix, also try adding...
Baked Potato Quiche: Mama's Got 'it' Loaded
All photographs are the property of Denise O. Do not use unless you get 'my' written permission. All written material is owned by Denise O, it will not be 'used' (sharing my article is different, it is acceptable and appreciated) without 'my' written permission. Just keeping it real folks.:)
My carrot cake recipe came from my mama's recipe box, I have altered some things here and there but, it has not taken away the wonderful taste of this classic carrot cake. Another reason why I love this cake is because, it can be made as a breakfast bread, minus the frosting. It can be made in a 13X9 cake pan and topped with some icing.
Or you can go over the top and make a three layer cake, loaded with cream cheese icing and coconut. The third option is my son's favorite cake so much, it is now his birthday cake every year. Mind you, my son is not a big vegetable eater by the way.
Ingredients
2 cups white flour (no self rising)
2 cups carrots (grated)
2 cups granulated sugar
1 cup (can) crushed pineapple
1 cup (sweetened) coconut flakes
2 cups walnuts
1/2 cup buttermilk
1/4 cup canola oil
1/4 cup butter
2 (whole) large eggs
2 egg yolks
2 teaspoons baking soda
2 teaspoons (ground) cinnamon
1 1/2 teaspoons salt
1 teaspoon vanilla extract
1 ripe banana (mashed well with a fork before adding to your mixing bowl)
1/2 cups applesauce (homemade is better)
Frosting Ingredients
1 1/2 cups butter (unsalted)
2- 8 ounce packages cream cheese
5 cups powdered sugar
1 Tablespoon Vanilla extract
You can decorate your layer cake with (sweetened) coconut, nuts and I will even toast coconut and add that, it just depends are what I have and the mood I am in.
We're Off
Preheat your oven at 350 degrees. Grease and flour your cake pans and set aside.
In a big mixing bowl place your sifted flour, baking soda, cinnamon and salt, mix then set aside.
This next step is essential: Empty your can of crushed pineapple, open and place your pineapple into a mesh strainer. With the back of your wooded spoon press out as much of the pineapple juice as you are able.
If you skip this step, you will be baking this cake for a long time and only end up with a burnt cake, that still jiggles in the middle.
So please take the time to do this one step.
Let's Get Nutty...
My husband is so sweet he bought me a kitchenaid mixer but, if you do not have a stand up mixer than just use a bowl and a hand mixer, it will be just fine.
In your mixer/big bowl place your oil, eggs, sugar, buttermilk, carrots, coconut, pineapple, banana, applesauce and your vanilla extract. Mix on low for 2 minutes or until all ingredients are well incorporated.
I find it takes less time in a standing mixer. Add 1/2 your flour and mix for around 30 seconds and then add the other half of your flour, mix for another minute or until all flour is well incorporated.
Then stir your nuts into your batter with a spoon.
Pour in that Goodness
If you are making a sheet cake, pour your finished batter into a (well) greased & floured 13X9 cake pan, bake for 40 minutes or until a tooth pick is inserted in the middle of your cake and the toothpick comes out clean. Cool on a rack and then frost.
If you want to make this a breakfast cake, omit the frosting, serve warm. Making sure you have plenty of butter and honey to top it off.
Now if you are wanting to go all the way and make your carrot cake a bit fancy...
Pour your carrot cake batter into 3 'well' greased & floured 9 inch cake pans. Bake for 30 minutes or until a tooth pick is inserted into the middle of your cakes and the tooth pick comes out clean.
Start Your Engines...
The day I am going to make this delicious cake, I take my butter and cream cheese out of the refrigerator and set them on my kitchen counter in the morning. You need room temperature butter and cream cheese, or you end up with a chunky and not so tasty icing.
Place your softened butter and cream cheese in your mixing bowl, mix for 2 minutes until both ingredients are well incorporated and starting to get a bit fluffy. Turn your mixer on low and start to add your powdered sugar, one cup at a time.
Allow the powdered sugar to absorb into the butter/cream cheese before adding the next half of cup. Repeat until all powdered sugar is gone.
When all your powdered sugar is incorporated add your vanilla extract, turn your mixer up to medium and mix for 2 minutes, until you get a fluffy consistency.
You only need half of your icing if you are making a sheet cake, place the other half into a container (I am using Alabama Tupperware) and place in the freezer for your next cake.
When you want to make another sheet cake, take out your icing, place it in the refrigerator over night to thaw out. When you are ready to use the icing, mix well.
Frosting 101
When I stated earlier that you are to grease and flour your cake pans, I really mean this when you are going to make this cake a 3 layer cake. By well greasing and flouring your pans, you are then able to take these lovely cakes out with ease.
Also very important is, make sure your cakes are cooled down completely.
Lay your first layer down on your serving plate. I do not cut this cake so as to make it even, I start with first layer and if I see that the first layer is a little lopsided, I will push it down, this cake if very forgiving.
When even then take 1/3 of your icing and ice the top and sides of that layer. Repeat until you have covered all three layers. I would usually tell you to place some wax/parchment paper around the cake, so you have a clean plate but, since you are adding coconut around the side, no one will spot a mistake and also, the coconut will hide any of the over flow of icing.
Make them Smile...
Yes there was a bit of work to be had but, all in all, putting a smile on the face of the ones you love it so well worth it. Once you have made this cake a few times, it really comes a easy recipe and one, I am sure you will be serving many times over.
Homemade Applesauce
When serving brunch this is a wonderful breakfast bread to add to your mix, also try adding...
Baked Potato Quiche: Mama's Got 'it' Loaded
All photographs are the property of Denise O. Do not use unless you get 'my' written permission. All written material is owned by Denise O, it will not be 'used' (sharing my article is different, it is acceptable and appreciated) without 'my' written permission. Just keeping it real folks.:)
Labels:
applesauce,
bread,
breakfast,
cake,
carrots,
coconut,
cream cheese,
Denise O,
dessert,
frosting,
icing,
nuts,
recipe,
recipes,
southern,
vegetarian
Tuesday, February 5, 2013
Potato, Squash & Carrot Stew + Chicken Salad: 1 chicken, 2 dishes
Adding Cilantro, a hint of lime and a ripen Tomato, makes this soup and sandwich meal over the top. I have made many chicken salad sandwiches in my lifetime and eaten just as many or more but, this version is my go to chicken salad, it hits every one of my taste buds that want to be touched.
I love a bowl of hot soup by itself but, to also pair it with a delicious chicken sandwich, then all I can say is you have a winning combination. I was raised on soups and stews, anything that would feed us hungry vultures. By watching Mama cook, taking mental notes (might I add) and also, with my years of feeding my own crew, I have learned to cook some very tasty one pot meals and a sandwich made the right way, is the icing on this meal.
You Will Need...
For poaching
3 pounds of chicken breast (boneless & skinless)
41/2 to 5 cups of water.
3 stalks celery
3 large carrots
2 onions
6 sprigs of fresh thyme
1 bay leaf (2 if they are small)
For Your soup...
5 cups poaching liquid, plus the carrots
6 cups of potatoes (will take 6 to 7, depending on there size)
3 1/2 cups of butternut squash (peeled & seeded)
1 large onion (or two small ones)
4 garlic cloves
2 1/2 teaspoons chili powder
1 1/2 teaspoon ground cumin
1/2 teaspoon ground chipolte chile pepper
Salt & fresh Cracked black pepper to taste
1 1/2 teaspoons honey
For Your Sandwich
5 1/2 cups cubed chicken breast (cooled)
1 1/2 cups carrots
6 green onion
1 2/3 cups of mayonnaise
1 can of green chilies (.45 ounce can)
2 1/2 tablespoons of cilantro (fresh only please)
Juice from 1/2 of a lime
1/4 teaspoon of ground chipotle chile pepper
Parmesan shavings
2 tomatoes (best they have, worth every penny)
6 hamburger buns
Butter (real please)
Start with Poaching...
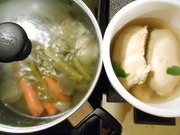
In a 5 quart dutch oven place your chicken, onions (cut into 1/4's), carrots, celery, thyme, bay leaf and 'fresh' cracked black pepper. After all is in, add your water to the pot, make sure you start out with cold water.
Place on the stove having your burner set on medium heat, right before it comes to a boil and you can see bubbles starting to rise up to the surface, turn the temperature down to a low simmer and cover with a lid.
Do not allow your chicken to come to a boil, if so then the vegetables and spices are not allowed the time to soak up all that goodness. Also, you do not want over cooked chicken on the outside.
How long you cook your chicken will depend on a few things, 'your' stove and the size of chicken pieces you are using and actually, just the meat itself can change the temperature.
Mine takes anywhere from 20 to 30 minutes. Please invest in a meat thermometer, when inserted into your chicken breast and it has reached 165 degrees, it will be done. I check every 5 minutes after the first initial 20 minutes.
Cool it Down
When your chicken has reached an internal temperature of 165 degrees, then it is done.
Pace your chicken breast in a bowl, add a few strips of lime zest, trying not to get any of the white, as it is bitter and then add the zest to your bowl of chicken breast and then top the chicken off with some of the poaching liquid.
Place your chicken breast in the refrigerator so it is able to cool down, nothing worse than adding mayonnaise to hot chicken when making chicken salad.
Strain your poaching broth into a bowl and add the carrots, the rest has met its doom, no flavor left so I discard them. Place your broth in the refrigerator to cool down. I would say in about 2 hours, the broth and chicken should be cooled down enough to continue on. Placing your broth in the freezer will cool it down faster.
All Your Ducks in A Row
The best way to make this soup is to have all your ingredients ready to cook, sitting right next to you. I find sitting at the kitchen table and cutting up vegetables is very relaxing. Also having your spices already measured out and on a plate, will help in making sure you have all your spices you will need.
Drain your cooked vegetables from your poaching broth, saving the broth and carrots, set aside.
Peel and dice both your squash and potatoes. Dice your onions in a medium dice and then slice the carrots that you just saved from your poaching liquid, slice cross wise, about a inch long.
Peel the skin off of your garlic cloves, cut in half and add to your spice plate. Make sure your honey and pepper mill is close by.
Fry & Boil
Place your cubed potatoes into your cooking broth. Cook for ten minutes after ten minutes has passed,
Add the carrots left over from your poaching broth. Grab your potato masher and start to mash.
Keeping the heat on medium low.
In a frying pan, on high heat, add 2 tablespoons of oil, allow the pan to get hot, then add your onion and squash. Stir fry for around 3 minutes.
After 3 minutes are up lower your heat to medium, add your spices and garlic cloves, stir for a minute, or until you are able to smell the garlic cooking, cover and cook for 5 to 7 minutes on low, until the squash is tender but, not falling apart.
Please do not skip the cooling down process of your poaching broth, if you do then you will have cooked potatoes on the outside but hard un-cooked potatoes in the middle.
Simmer that Goodness
When mashing your potatoes and carrots remember that you want your soup to resemble a more rustic consistency.
Cook on simmer for 5 minutes, stirring once, make sure you hit the bottom of the pan with your spoon, so as your soup will not scorch.
Remove the garlic cloves from your squash & onions and then add to your potato and carrot pot. Add your honey, taste and then adjust for salt and pepper. Cook together on medium low for around 6 to 8 minutes.
I like to add a few tablespoons of heavy cream at the end, it adds some depth and makes for a more luxurious soup. As they do say 'fat adds flavor'.
Sandwich Time
Take your chicken out of the broth, discard the lime zest and add the broth back to your pot of soup and mix. Dice your chicken in bite size chunks, add back to your bowl.
Grate your carrots, slice your tomatoes, green onions add to your bowl of chicken.
Strain the green chili's in a small mesh strainer, take the back of a wooden spoon and push out all the juice. Then add the juice of half of a lime over your green chili's and set aside. Allow the chili's and lime juice to drain as you get the rest of the ingredients ready.
In a separate bowl add mayonnaise, ground chipolte pepper and cilantro, mix well. After your mayonnaise is well incorporated, add to your chicken and toss in your green chili's.
Buttered UP!
In a separate bowl add mayonnaise, ground chipolte pepper and cilantro, mix well. After your mayonnaise is well incorporated, add to your chicken and toss in your green chili's.
In the mean time butter your hamburger buns, one side and plate on a griddle or a frying pan and toast one side of the bread.
I have found that using real butter makes this sandwich go from great to 'fantastic'.
Also, it is key to get a ripen tomato, I actually paid 4 dollars for these two (big) well ripened tomatoes, it is so key to making this sandwich as mouth watering as it is and also, salt & pepper your tomatoes as you add them to your sandwiches.
Make it 'even' Better...
After you have topped off each hamburger bun take a chunk of parmesan cheese and a potato peeler, shave a few slices of parmesan cheese and place on top of your chicken salad and then top with a tomato slice and then top it off with your bun.
Now this would make a great lunch or supper for anyone, just add a few chips on the side. If I decide to give my dear husband this sandwich for his lunch during his lunch break, I take a few extra steps.
I will toast the bread, make sure it has cooled down before I place it into a sandwich bag. I place the chicken salad in a container and the tomato slice is also placed in a separate baggie. This was my husband can put it altogether at work during his lunch break and not have a soggy sandwich. Well worth the trouble.
Soup & Sandwich...
Yes the sandwich is delicious on its own, as is the soup but add them together and you have the perfect match. Between the hot healthy soup, paired with this flavor packed sandwich your family will be begging you to make this meal every week. Since I came up with this recipe, we now have it once a week.
For another delicious yet easy recipe...
Lentil & Vegetable Soup
All photographs are the property of Denise O. Do not use unless you get 'my' written permission. All written material is owned by Denise O, it will not be 'used' (sharing my article is different, it is acceptable and appreciated) without 'my' written permission. Just keeping it real folks.:)
In the mean time butter your hamburger buns, one side and plate on a griddle or a frying pan and toast one side of the bread.
I have found that using real butter makes this sandwich go from great to 'fantastic'.
Also, it is key to get a ripen tomato, I actually paid 4 dollars for these two (big) well ripened tomatoes, it is so key to making this sandwich as mouth watering as it is and also, salt & pepper your tomatoes as you add them to your sandwiches.
Make it 'even' Better...
After you have topped off each hamburger bun take a chunk of parmesan cheese and a potato peeler, shave a few slices of parmesan cheese and place on top of your chicken salad and then top with a tomato slice and then top it off with your bun.
Now this would make a great lunch or supper for anyone, just add a few chips on the side. If I decide to give my dear husband this sandwich for his lunch during his lunch break, I take a few extra steps.
I will toast the bread, make sure it has cooled down before I place it into a sandwich bag. I place the chicken salad in a container and the tomato slice is also placed in a separate baggie. This was my husband can put it altogether at work during his lunch break and not have a soggy sandwich. Well worth the trouble.
Soup & Sandwich...
Yes the sandwich is delicious on its own, as is the soup but add them together and you have the perfect match. Between the hot healthy soup, paired with this flavor packed sandwich your family will be begging you to make this meal every week. Since I came up with this recipe, we now have it once a week.
For another delicious yet easy recipe...
Lentil & Vegetable Soup
All photographs are the property of Denise O. Do not use unless you get 'my' written permission. All written material is owned by Denise O, it will not be 'used' (sharing my article is different, it is acceptable and appreciated) without 'my' written permission. Just keeping it real folks.:)
Subscribe to:
Posts (Atom)


.jpeg)


.jpeg)


.jpeg)


.jpeg)

.jpeg)
.jpeg)

.jpeg)
.jpeg)